Category Archives: Tips & Tricks

Ryuzine Press Lightboxes in Gutenberg Editor

NOTE: If you are using the ryuboxlink and ryubox shortcodes and the old format Ryuzine “lightbox” add-on there is a separate post about using the shortcodes in Gutenberg.

The Gutenberg “block” editor is one of the biggest changes in the newer versions of WordPress.  If you’ve only ever used the TinyMCE “WYSIWYG” editor it can be a bit confusing.  Here is how to use the newer lightbox format in Ryuzine Press running the “ryulightbox” add-on.

In a Classic Block

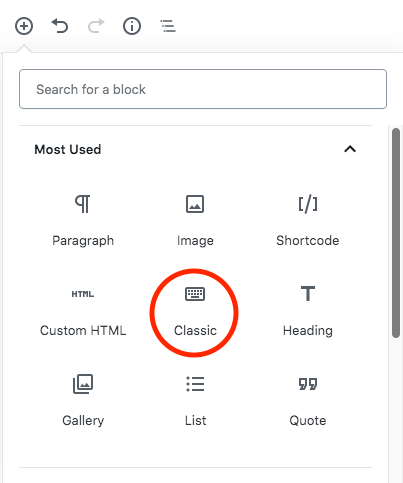
Go to the (+) to add a new block and select “Classic.”  If it’s not in your “Most Used” yet it will be in the “Formatting” sub-section.  Once you have the Classic Block it’s just like using the old TinyMCE editor:

If you click on the image you’ll get the old Image Edit toolbar above it.  Select the “Pencil” icon and it will open the old Image Options dialog box.  If you need to you can adjust the size of the image from thumbnail, medium, large, full-size, or custom-size from there.  But to make it work with the “ryulightbox” add-on you need to click on the “Advanced” to expand the section (if it’s not already expanded):

Rather importantly the thumbnail has to LINK to something!  When the “ryulightbox” add-on isn’t loaded (as it won’t be when viewing the post elsewhere on your WordPress blog) the thumbnail will just be a regular link, that either opens the target content in a new tab (if you checked the “Open link in a new tab” box) or in the same window.

Then, in the “Advanced” section you need the Link Rel to be “lightbox” and (optionally) the Link CSS Class to be one of the ryulightbox types.

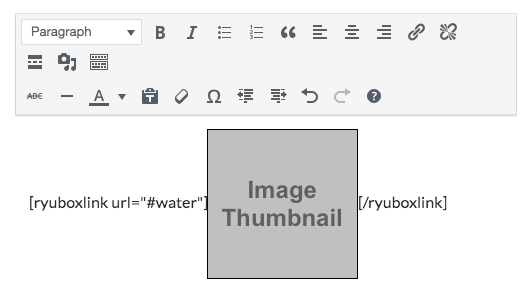
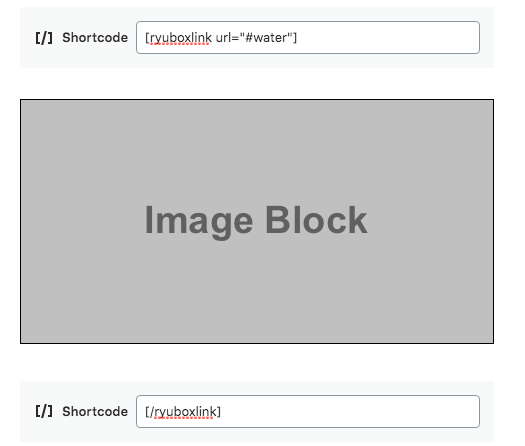
It can also be an anchor link to something embedded in the Ryuzine Press Edition, but then the link will be broken if the post is read elsewhere on your WordPress blog.  If you prefer to embed the target content in the Ryuzine Press Edition you should consider using the ryuboxlink and ryubox shortcodes instead, because the links and the content can be conditionally hidden elsewhere on your blog where they don’t work.

In an Image Block

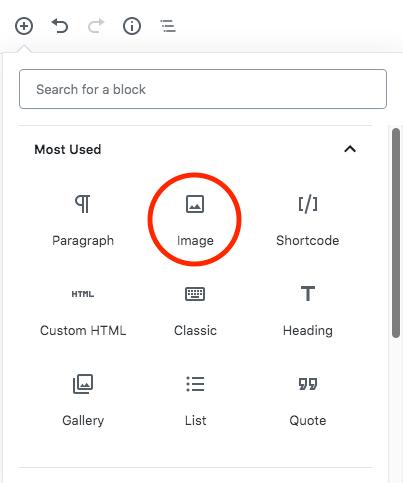
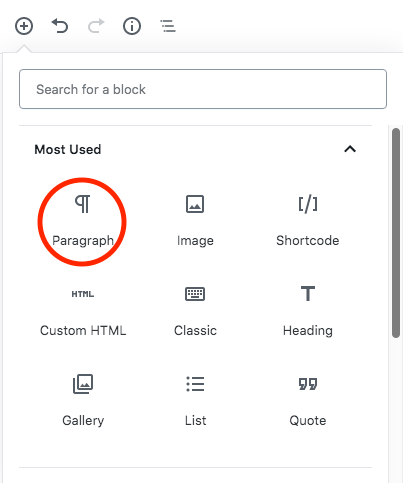
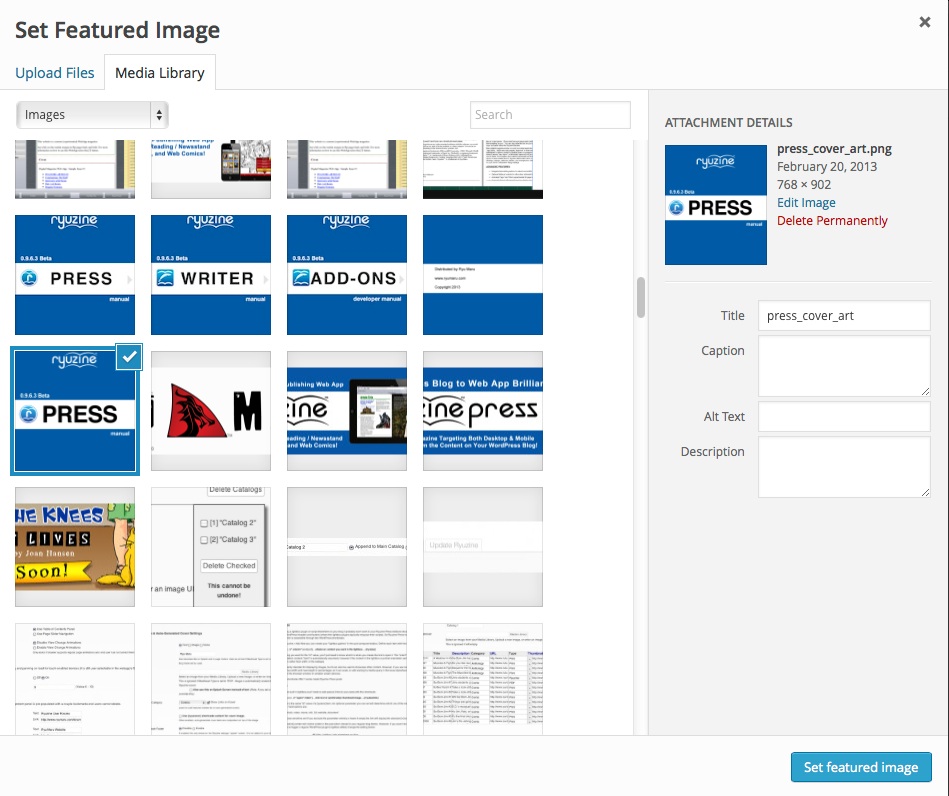
Click the (+) and select “Image” block.  That will give you an empty one where you choose the Image Source:

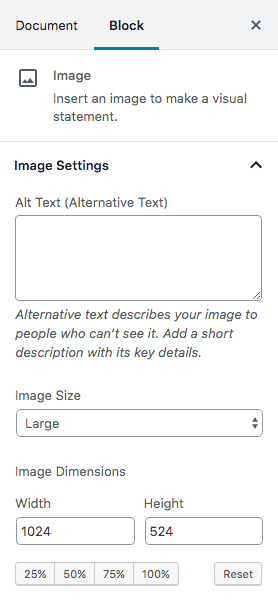
Once you’ve place your image you need to look in Gutenberg’s right sidebar area, under the “Block” tab scroll down to the “Link Settings” sub-section:

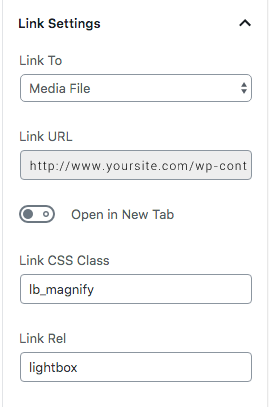
For the Lighbox to work the image MUST link to something!  Typically the “Media File” (aka, the larger version of the image) will be the target.  The Link Rel to be “lightbox” and (optionally) the Link CSS Class to be one of the ryulightbox types. When the “ryulightbox” add-on isn’t loaded (as it won’t be when viewing the post elsewhere on your WordPress blog) the thumbnail will just be a regular link, that either opens the target content in a new tab (if you turned on the “Open link in a new tab” switch) or in the same window.

The valid content types are:

lb_3d, lb_document, lb_info, lb_larger, lb_magnify, lb_minus, lb_movie, lb_photo, lb_plus, lb_video, lb_website, or lightboxbutton.  If you leave it blank the generic “lightboxbutton” will be inserted by the “ryulightbox” add-on.  This only changes the style of the lightbox link icon in the lower corner of the thumbnail, it doesn’t set the type of content, which can be anything.

Ryuzine Press Shortcodes in Gutenberg

Note: This post is only relevant if you are using the Ryuzine “lightbox” (old format) add-on.  If you are using the newer “ryulightbox” add-on details for that are in another post.

One of the biggest recent changes in WordPress has been the change from the TinyMCE “WYSIWYG” editor to the Gutenberg “Block” editor.

If you have existing Ryuzine Press Editions and associated posts there’s nothing you should need to do.  Gutenberg automatically ports the content of old posts (the ones written with the TinyMCE editor) into a single “Classic” block.  That should preserve any shortcodes you used in those posts.  And your done!

For new posts you have three options for using the Ryuzine shortcodes (focusing on the “lightbox” shortcodes, ryuboxlink and ryubox which are the most likely ones you’d be using):

  1. Create a “Classic” block and type them inline just like you always have.
  2. Create a “Paragraph” block and type them inline just like you always have.
  3. Create a “Shortcode” block (for Ryuzine’s shortcodes you’d need one before and after the content block).

IMPORTANT: The thumbnail image or text inside a “ryubox” or “ryuboxlink” cannot have a link applied to it!  It gets the link URL from the shortcode.  If you also make the image/text into a regular link when it is converted to a lightbox link it will try to next a link inside a link.

Classic Block

Click on the (+) to select a new block.  If it’s not in your “Most Used” it will be under the “Formatting” sub-section.  This should be a no-brainer as it works just like the old editor, except smaller:

If you click on the image you get the old editing toolbar.  Select the “Pencil” icon:

..and you get the old image options screen where you can select thumbnail, medium, large, full-size, or custom size options.

Paragraph Block

The Paragraph block is most likely already in your “Most Used” blocks.  It’s also the default block Gutenberg creates.  You have the option to place inline images in Paragraph Blocks:

Currently Gutenberg automatically forces the inline images to 150 pixels wide with automatic height.  There are no options to select a thumbnail, medium, large, full-size.  Maybe the 150 pixel wide inline image is what you want, but if it isn’t use one of the other methods outlined here.

Shortcode Blocks

Click the (+) to add a new block and select “Shortcode.”  Initially you’ll probably have to find it under the “Widgets” sub-section.  That will add a shortcode block in which you enter the opening part for the Ryuzine shortcode.  Then you have to create another block for the content inside that shortcode, in this case an Image Block, and then another Shortcode Block to close:

To change the image size you can either manually resize it by clicking on it and dragging the handles around or you can select “Block > Image Settings” in the sidebar:

DEPRECATION NOTICE

The old format “lightbox” add-on and the shortcodes are going to be phased out!  Ryuzine 1.1 will still support using them but after that the the “lightbox” add-on will no longer be updated and the shortcodes information will be removed from Ryuzine Press (the shortcodes will still be processed, but the information page on how to use them will be removed and publishers should stop using them now).  Ryuzine now has code to automatically convert old format embedded content to display in a generic Ryuzine dialog box if no lightbox add-on is loaded.  The better solution, though, is to switch to the “ryulightbox” add-on, which is backwards-compatible and automatically converts old format lighbox links and embedded content to the new format.

Ryuzine + Chrome + Mac = System Freeze [FIX!]

There is an issue being experienced by some users of Chrome on Mac OS X when viewing a Ryuzine publication.  What happens is the publication displays with glitchy graphics and any attempt to interact with it will cause the entire screen to glitch and the system to freeze, requiring a hard reset.

This is a known, recurring bug in Google Chrome involving hardware acceleration on some versions of Mac OS X, beginning with Mavericks.  Note that this is not a problem with Ryuzine or exclusive to viewing Ryuzine publications.  Other hardware accelerated web content can also trigger this problem.

Here is the work-around to prevent it from happening in the future:

  1. Type “chrome://settings/” in your browser’s address bar.
  2. Scroll to the bottom and click “Advanced Settings” to expand it.
  3. Find the “System” section and UNCHECK the “Use hardware acceleration when available” if it was already checked or CHECK it if it wasn’t (in other words try it both ways).
  4. Restart Google Chrome
  5. Return to the Ryuzine that crashed your system, it should no longer cause screen freezing.

However, the display of the Ryuzine publication may still be very blocky/glitchy!  This has also been observed in Google Chrome for Android.  Here’s how to fix that:

  1. Open the “Options” panel and look for “Depth FX” in the Add-Ons section.
  2. Make sure the switch is set to “OFF”
  3. If it’s still glitchy turn “Page Shadows” off as well.
  4. If it’s still glitchy turn “3D Page Turns” off too.
  5. The absolute last ditch effort is to turn off “Page Animations” as well.

You may need to change these settings for multiple publications if they are on different domain servers.


Restore Ryuzine Writer Full Screen View

When Ryuzine Writer 1.0 was released the “Maximize/Minimize Editor” button was removed from the toolbar.  This was like the “Fullscreen” or “Distraction Free” modes in various word processors.  It was removed because there were some reflow errors when you’d pop out of that mode that require you to resize the browser window or hide/unhide the sidebars.  Rather than requires people to do this (and know this) the problematic button was removed.

We didn’t actually remove it from the program entirely, just disabled it.  So if you liked it and want it back it’s fairly easy to re-enable it.  It’s actually a Xinha module and you can re-enable it by finding the file in:

ryuzine –> ryuzinewriter –> js –> editor.config.js

Change line 280 to:

[“htmlmode”],[“undo”,”redo”],[“popupeditor”],

That “popupeditor” will add back the view-fullscreen Fullscreen button.  It will be available in both WYSIWYG and HTML Editor modes.  To return from Fullscreen mode press the view-restore Restore button.  However, the Editor workspace may be squished into a narrow band across the center of the window.  If that happens panels Toggle Sidebars off/on or resize the browser window.

Note that the Sidebars no longer automatically toggle off/on when you (respectively) enter/exit Fullscreen mode as they did in earlier versions of Ryuzine Writer.

Ryuzine Press Missing Editions Work-Around

It has come to our attention that the current version of the Ryuzine Press plugin for WordPress will only automatically add the first 10 Ryuzine Press Editions to the plug-in’s Ryuzine Rack (Archive) page.

If you’ve noticed older Editions falling off your Rack/Archive newsstand page the current work-around  is to manually move/copy the “archive-ryuzine.php” file from:

~/wp-content/plugins/ryuzine-press/templates/ => ~/wp-content/themes/[current theme]/

The Ryuzine version 1.0 release is coming soon and will fix this problem, but in the meantime the work-around above will make sure your readers see all the Editions you want them to see.

Ryuzine Edition Cover Art: 3 Methods

As of version 0.9.6.8 Ryuzine Press now has three different ways to create covers for your Editions.

1. Oldest Post

This one is pretty easy.  If you plan to have ALL your Edition covers work this way you go to:

Ryuzine Press > Options > Covers and set “Cover Source” to “Use Oldest Post.”

cover-source-oldest
As the setting implies, the oldest post assigned to the Edition’s Ryuzine Issue(s) will be used as the cover of the Edition.  For regular posts just use the “Add Media” button to place an image to be used as cover art into the post body, assign it to the same Issue as the Edition, and (if necessary) edit the post date to make sure it is the oldest post.

If you are using one of the supported comic plugins that creates its own custom post_type you’d just need to “Add” a new comic and attach your cover art as the Featured/Comic Image for the post.  Again, make sure it is assigned to the same Issue as the Edition and the posting date will make it the “oldest” post.

If you want to over-ride the global setting mentioned above, you can now do so by using a Custom Configuration (it’s in the new section at the bottom of the post editing page for the Edition).

custom_config

2. Edition Featured Image

If you intend ALL your Edition covers to use this method, go to:

Ryuzine Press > Options > Covers and set “Cover Source” to “Generate Automatically.”

cover-source-auto

If you also want other things – such as a Masthead Image or a list of “Featured Articles” superimposed on your cover image set those in the Options section named “Splash Screen & Auto-Generated Cover Settings.”  Setting these items is optional, but if you do use them remember they are “global” and will be applied to all Editions that use the default settings.

auto-cover-overlays

If you don’t plan to use the shortcode option (covered in the next section) you can also let the plugin know not to even look for it, or in a Edition-specific custom configuration to prefer the Featured Image:

cover-image-use-featured

On the post editing page for your Edition scroll down and look for the standard “Featured Image” section.

featured_image

Click the link to open the Media Manager and select the image you would like to use for the cover art on this Edition.

select_featured_image

That’s it!  Now that cover art will show up as the cover of the Edition and as the thumbnail in Ryuzine Rack (or if you are using the regular archive page it will appear in that list).

featured_image_set

Again, you can over-ride the Cover settings on a per-Edition basis with the “Custom Configuration” section on the Edition edit page.  Result:

featured-no-bleed

While this is easy, it doesn’t give you much control over how your cover art is displayed within the Edition.  For more control use the next method…

3. Cover Shortcode

Like method two above this one requires that the “Cover Source” is set to “Generate Automatically” but you’ll also need to go down into the “Splash Screen & Auto-Generated cover Settings” and find the item labeled “Cover Image” and make sure it is set to “Use [ryucover] shortcode.”

cover-image-use-ryucover

Now, on the edit page for your Edition, in the main post body section type out the opening and closing shortcodes:

[ryucover] [/ryucover]

Place the cursor in between the two bracketed items and use the “Add Media” button to select your cover art from the Media Manger.  You only need to place the “Medium” size image (do not place the “Thumbnail” since that will be cropped).

ryucover

Without any parameters the shortcode will embed an image as the cover in the same way as the “Featured Image” method does.  However the shortcode has other options for how to display the image:

Example: [ryucover bleed=”cover” color=”blue” shift=”top left”] [/ryucover]

The “bleed” parameter will set it as a background image using CSS:

0 | null : zero or no value (or omitting “bleed” entirely) embeds the image with the <img> tag.

featured-no-bleed

1 | cover : fits the image, maintaining the aspect ratio, so that it completely covers the entire page container, leaving no white space or border around it (the image may extend beyond either the right or the bottom edges).

bleed-cover

2 | contain: fits the image, maintaining the aspect ratio, to the SMALLEST size that will fit BOTH the width and height without allowing any of the image to extend beyond the page container edges – though this will probably leave a white border around the image in one or both directions.

bleed-contain

3 | width: centers and scales the image, fitting it by the width so it does not extend beyond the left or right edges of the page container, but may either go beyond the top and/or bottom or may have a white border above/below the image.

bleed-width

4 | height: center and scales the image, fitting it to the height of the page container, but may allow it to extend past the left/right edges or fall short of and leave a white border on the left/right of the image.

bleed-contain

Generally “cover” and “width” give the similar results and “contain” and “height” give the similar results – but may render slightly different bordering if they are not an exact fit for the space.

You can also set a background color with the “color” parameter and a valid HEX code (either like #cccccc or #ccc shorthand), HTML color name, or an rgb/rgba color set. If you are using a cover bleed setting that is rendering white bars around your cover art you can set a background color to make it less obvious or to frame your cover art in a more pleasing way.

The “shift” parameter allows you to adjust the positioning of the background image.  The default position is top and center.  You can use either numerical value pairs ( such as “0 0” or words “top left”).  However you can end up shifting parts of the image so they go beyond the edges of the page container:

bleed-height-shift-center-center

In the image above the setting was bleed=”height” shift=”center center” which allows the sides of the image to be cropped off. Changing the setting to bleed=”contain” wouldn’t do this.


However you may prefer to put your Ryuzine Press Editions together, we’ve got your covers covered. 😉

Ryuzine Writer PHP Patch

Note: This patch is included in Build 20131101.01, go to the Help > About screen in Ryuzine Writer to see the build number.  If you don’t see that number your install is outdated.

Issue:
PHP File Operations fail when Ryuzine Writer is being run from
a server with the latest version of PHP installed.

Cause:
The PHP files included with Ryuzine Writer utilize a form action
that is no longer supported by PHP. This old method was dropped
because it could expose forms to injection attacks.

Installation:

Download the Patch and unzip it.

Drag and drop all the files in the /patch folder to:

[Ryuzine PDK location]/DEV/ryuzinewriter/

For example, on our Mac OS X dev system it would be:

/Applications/XAMPP/xamppfiles/htdocs/Ryuzine_PDK_0.9.6.5/DEV/ryuzinewriter/

And replace/overwrite the PHP files already there.
Reload Ryuzine Writer in your web browser.

If you are still encountering PHP errors try to delete any “tmp” folder
that may be present in your Ryuzine PDK installation and reload the web app
in your web browser.

Patching Previous Versions

  1. Open each of the PHP files in the /ryuzinewriter sub-folder in a plain text or code editor
  2. Find the line with the <form> element (if present)
  3. Change action=“<?php echo $php_self ?>” to action=“”
  4. Save the file
  5. Reload the Ryuzine Writer web app in your browser

ePUB Export Add-On

Druck

We now have an experimental ePub Export Add-On for Ryuzine Writer!  You can now also export your Ryuzine publications to ePub 3.0 format with a couple button clicks.  You’ll need at least Ryuzine Writer 0.9.6.4 and the 21KB zip archive with the add-on itself:

>> GO GET IT HERE <<

Once you’ve got it installed and have PHP File Operations enabled the process goes something like this:

1. Compose or Load a Ryuzine file into the rich-text editor (you don’t even need to “Build” it if you aren’t also creating one in Ryuzine format).
2. Press the [ > ] button and then the [ ePub Export ] button.  The new Workspace loads.
3. Press the “Auto Fill” button to automatically populate the form with information about your publication.
4. Press the “Build” button and wait for a shiny, new ePub file to drop into your downloads folder.

Be aware that this is a version 0.1 “Alpha” release of this Add-On, so there are no guarantees.  Make certain you read the “Known Issues” in the README file bundled with the Add-On.  Files produced with it were tested in Azardi 19, ePubView 1.2, Adobe Digital Editions 1.7.2, and Adobe Digital Editions 2.0 on a Mac.  All of the files produced could be opened, however some would occasionally, randomly crash the latter two Adobe reader apps (still investigating why).  The .epub files produced are unlikely to validate but generally do not contain major errors that prevent them from being opened and read.  Also be aware that rendering of EPUB 3.0 format can vary greatly from one e-reader app or device to another, meaning it is highly unlikely the ePub version of your publication will look exactly like your Ryuzine version.

Got skills and want to help improve it?  We’ve set up a GitHub Repository for this Add-On at: https://github.com/ryumaru/epub-addon where you may find more recent stable and unstable versions.

UPDATE 2013-10-30 – updated to version 0.2 alpha which fixes a problem with form submission that prevented the add-on from building the epub package on servers running newer versions of PHP.  To update just trash/overwrite your existing file in ~/ryuzinewriter/addons/.

UPDATE 2015-08-30 – updated to version 0.3 alpha which is compatible with the new Add-On API for Ryuzine Writer v1.0.  It is included in the Ryuzine PDK download.

Five Tips for Building Better Ryuzine Publications

One of the cool features of the Ryuzine publishing platform is how you can create a traditional magazine or comic book reading experience through a web browser using nothing more than HTML5, Javascript, and CSS3 technologies.  But the best ways to leverage the format may not be readily apparent.  This article seeks to help you with building better Ryuzine publications that will work for both you and your readers, regardless of what device they prefer to use. Without further ado, here we go!


5. Don’t assume page order dictates the reader’s experience.

When you pick up a physical magazine you probably start at the front, see the Table of Contents, leaf through it, and if you ever do skip around it’s because an article you were reading (which probably broke over more than one consecutive page) was concluded in a column near the back. But you can’t assume that’s how someone will experience your Ryuzine publication (with the possible exception of webcomics, which really only work when experienced in the proper order).

Especially with Ryuzine Press Editions (which exist concurrently as blog posts outside the editions), but also for other publications where a specific page’s bookmark may have been shared, a reader may come into the publication almost anywhere. Ryuzine tries to help people get their bearings by always having a Table of Contents panel available, but you should consider each page of a Ryuzine publication is more like a miniature website unto itself – a sub-section that should only ever spill into another part of the publication if you did so for a reason (in our own sample magazine we show an article that is broken over sections, but the reason is the same as that used in print magazines – to lead readers deeper into the publication and to a page with advertising). As each and every page of a Ryuzine publication is theoretically of infinite length (just like any web page) there really is no technical reason to ever break a story over multiple pages.


4. Don’t go overboard on advertising.

Traditional magazine publishing has long been supported in large part by selling advertising space within the pages. You can place ads on pages in a Ryuzine publication just like you can in a print publication, but Ryuzine also incorporates some built-in web and app advertising options including a mobile style banner, a full-page “splash” ad, and an overlay “box” ad.

But don’t go overboard and make your readers wade through too much advertising to get to your content. The content should be the main focus and only include enough advertising to help cover your expenses in producing it. The ad model is a good fit for online publications given that people are accustomed to things being free (and advertising supported) online, but a site or publication that feels like it is “spamming” people with ads will chase the audience away.

Actually one of the best uses of Ryuzine may be situations where the entire publication itself IS the advertisement. For example using it to create a “sample” of a larger digital publication (perhaps in eBook format) or as an online sample of a print publication. It’s also a great format to adapt organization newsletters (which tend to be short and fast loading content in maybe 8 or 12 pages) or product sales brochures.


3. Don’t just duplicate print content.

If what you want is a digital version that is exactly like an existing print publication you’ll probably be happier with a PDF file. Your readers, however, may not be. Especially if they’re on a phone and have to zoom in and out and pan around just to read it. A Ryuzine publication uses a “responsive” layout that adapts to different screen sizes and allows users to adjust the font size to their personal preference.

You should think about how your publication will look when viewed on small screens and large screens and in both portrait (single page) and landscape (two-page spread) views. The “thisissue.css” file is where you can magically adjust the layout of your content to address the varied viewing scenarios.


2.  Don’t forget the “digital!”

Text and images can obviously be reporduced in a Ryuzine publication just like they can in print. But a Ryuzine publication, by being digital and online, can do things print media can’t. Leveraging the capabilities of the web browser is an important part of creating engaging content that will keep your readers attention, build your audience, and hopefully keep them coming back for more.

You can embed all sorts of “rich content” in a Ryuzine, either in the pages themselves or in the Lightbox Gallery. In fact the whole Lightbox feature was included exactly for this sort of use! Embed a YouTube video, an IFRAME with a linked website displayed in it, VR objects or panoramas, high resolution imagery. There are all sorts of ways you can enhance and expand the “magazine” content with dynamic and enaging WEB content.


1. Avoid running too long.

You’ve probably seen the abbreviation “tl:dr” online. It means “Too Long; Didn’t Read.” Especially on small screen devices a lot of text means a lot of scrolling, but there has long been a bias against presenting a “wall of text” online. Many people find reading on a screen more taxing than reading off of paper, so if you don’t want people to just tune you out don’t go long. They say a picture is worth a thousand words, and online people would rather see pictures on their screens than text. What text is presented is usually just skimmed, so adjust your writing (even consider editing or rewriting) just for your online audience.

Also don’t go too many pages! Nobody really wants to read hundreds of pages online and they want to load hundreds of pages of content even less than they want to read it. A Ryuzine publication is, when stripped of all it’s cool features, a single HTML web page. The entire publication technically exists as a single document and the longer it is the longer it takes to load. If you publication is taking too long to load your readers may think it either has frozen, crashed, or isn’t worth the wait. People online are incredibly impatient! Publications that are more like “newsletters” than a “compendium” will do better. They’ll also be less likely to crash mobile browsers! Most mobile browsers have limits on how much storage a specific web URL can use, and on iOS devices like the iPhone and iPad they’ll simply crash the browser (taking the user back to the Home Screen) instead of loading a really, really big document. The best way to remember that is “short is sweet, long is wrong.”

Writer Add-Ons

addons_cover

Ryuzine Writer version 0.9.6.3 introduces a new “add-on” system we hope may spur some third-party development of extensions to our stand-alone authoring webapp.  In fact, we’ve moved several parts of Writer from core code into optional add-ons.

This new add-on system also has some functions that make it easy to add your own “Start Screen” shortcut buttons, dialog boxes, output options, even entire custom “workspaces” appended to the ones already included in Ryuzine Writer.

Because this is new and of a much more technical nature than the rest of the Writer manual, which is targeted at publishers not programmers, we’ve created a manual “supplement” focused exclusively on this new add-on system available at https://www.ryumaru.com/library/addons096x.htm

It should also be mentioned that the “rich text” editor used in Ryuzine Writer is a highly modified version of the Xinha project, which has it’s own, entirely separate, plug-in and theme system.  Some of the Ryuzine Writer editor functionality and themed appearance is implemented through those systems, but if you want to install or develop a extension for the rich text editor be aware third-party plug-ins may not work with our modified version and (vice versa) if you develop an extension in conjunction with the implementation in Ryuzine Writer your plugin may not work properly in the unaltered editor, so make sure you test it!