Writer 1.0 Manual
Publisher's user manual for Ryuzine Writer 1.0
Front Cover
 WRITER
Version 1.0
Publisher's Manual
Notice
Copyright 2015 K.M. Hansen & Ryu Maru.
All rights reserved. Reproduction and adaptation of this manual is prohibited without prior written permission, except as allowed under copyright laws. Automatic translation through online methods or devices is allowed. The programs that control this product are copyrighted.
Software Release Information
Version 1.0
Released August 2015
This manual was created in Ryuzine format with Ryuzine Writer.
Notice of Liability
The information in this manual is distributed on an "As Is" basis, without any warranty, and subject to change without notice. Neither the author nor publisher shall have any liability to any person or entity with respect to any loss or dmange caused or alleged to be caused directly or indirectly by the instruction contained in this manual or by the computer software products described in it. In the event that you do experience any undocumented problems with this software, we would like to hear about it and will do our best to fix the problem in a future release. You can let us know about bugs at www.ryumaru.com or on GitHub.
Trademarks
Internet Explorer® is a registered trademark of Microsoft® Corporation. iOS®, iPhone®, iPod®, iPad®, and Safari® are registered trademarks of Apple Inc. Firefox® is a registered trademark of Mozilla Corporation. Opera™ is a trademark of Opera Software ASA. InDesign® is a registered trademark of Adobe Systems Inc. Scribus Copyright 2001-2011 Franz Schmid and rest of the members of the Scribus Team. Ryuzine™ is a trademark of K.M Hansen & Ryu Maru.
Ryuzine Writer Publisher's Manual
First Edition (October 2011)
Second Edition (August 2015)
Title Page
Ryuzine Writer
Publisher's Manual
Version 1.0
K.M. Hansen
![]()
1. Introduction
![]()
Ryuzine™ is a family of webapps built on HTML5, CSS3, and Javascript designed to deliver a rich "app experience" publishing platform to mobile and desktop browser. Because they run inside the web browser there is no native app to download and install, no app store needed, no DRM, and the "responsive" interface adapts to different screen sizes allowing you to publish once for multiple platforms. The Ryuzine family of webapps includes:
![]() Ryuzine Reader - a publication format that doesn't require a separate e-reader app because the browser you already use is the e-reader. It offers numerous features including multiple bookmarks, font size adjustment, high-contrast and sepia page color options, integrated "mobile style" advertising options, alternate views, and highly customizable User Interface through a simple "theme" file plus targeting different platforms with different themes. Ryuzine publications can be hosted "in the cloud" on any website, packaged into archives for distribution as downloads for offline reading, or packaged as a native Android app1.
Ryuzine Reader - a publication format that doesn't require a separate e-reader app because the browser you already use is the e-reader. It offers numerous features including multiple bookmarks, font size adjustment, high-contrast and sepia page color options, integrated "mobile style" advertising options, alternate views, and highly customizable User Interface through a simple "theme" file plus targeting different platforms with different themes. Ryuzine publications can be hosted "in the cloud" on any website, packaged into archives for distribution as downloads for offline reading, or packaged as a native Android app1.
![]() Ryuzine Rack - a "newsstand" style webapp designed to make it easy to promote your Ryuzine publications (or anything else you want to promote). The stand-alone version uses simple HTML files for the "catalogs" of items, can host unlimited additional catalogs organized however the publisher wants (different titles, years, languages - it's up to you!), user defined "Reading List" feature, items which can be sorted by multiple aspects, and an animated "promotion" carousel. Building the data catalogs for the "stand alone" version is really easy with Ryuzine Writer and the Ryuzine Press Plugin (see below) also has a utility for WordPress-powered catalogs.
Ryuzine Rack - a "newsstand" style webapp designed to make it easy to promote your Ryuzine publications (or anything else you want to promote). The stand-alone version uses simple HTML files for the "catalogs" of items, can host unlimited additional catalogs organized however the publisher wants (different titles, years, languages - it's up to you!), user defined "Reading List" feature, items which can be sorted by multiple aspects, and an animated "promotion" carousel. Building the data catalogs for the "stand alone" version is really easy with Ryuzine Writer and the Ryuzine Press Plugin (see below) also has a utility for WordPress-powered catalogs.
![]() Ryuzine Writer - a powerful cross-platform, cross-browser "authoring" webapp for creating Ryuzine publications, custom configuration files, and Ryuzine Rack data catalogs. Compose from scratch in the rich-text editor, start with the Template Wizard, or import and edit existing files. There is also a multi-device "simulator" in which you can see how your publication will look and work across a variety of screen sizes. Ryuzine Writer works in most modern desktop browsers.
Ryuzine Writer - a powerful cross-platform, cross-browser "authoring" webapp for creating Ryuzine publications, custom configuration files, and Ryuzine Rack data catalogs. Compose from scratch in the rich-text editor, start with the Template Wizard, or import and edit existing files. There is also a multi-device "simulator" in which you can see how your publication will look and work across a variety of screen sizes. Ryuzine Writer works in most modern desktop browsers.
![]() Ryuzine Press - a plugin for WordPress blog sites which "bridges" the blog content to a Ryuzine installation on the same server. Create unlimited "editions" from your blog content presented in the engaging Ryuzine format. Promote your editions - and other items - with the (optional) bundled version of Ryuzine Rack. The Ryuzine Press Plugin replaces Ryuzine Writer with the WordPress backend for creating, editing, and organizing your content. It is also compatible with the ComicPress, Easel, and Webcomic plugins for building dynamic online comic books and manga from your existing WordPress-powered webcomic archives.
Ryuzine Press - a plugin for WordPress blog sites which "bridges" the blog content to a Ryuzine installation on the same server. Create unlimited "editions" from your blog content presented in the engaging Ryuzine format. Promote your editions - and other items - with the (optional) bundled version of Ryuzine Rack. The Ryuzine Press Plugin replaces Ryuzine Writer with the WordPress backend for creating, editing, and organizing your content. It is also compatible with the ComicPress, Easel, and Webcomic plugins for building dynamic online comic books and manga from your existing WordPress-powered webcomic archives.
This manual covers the Ryuzine Writer authoring webapp for publishers creating "stand alone" publications and newsstands. It assumes you are at least familiar with Cascading Style Sheets (CSS), HTML web pages, and document editing. It is also helpful if you understand file and folder structures, web servers, and editing images. This manual is not intended for end users of Ryuzine Reader, it is intended for authors and publishers. All of the Ryuzine products are now free, open source software released under either the Mozilla Public License 2.0 or GNU General Public License 3.0.
Note: Most of the screen shots throughout this manual are of Ryuzine Writer running in either Google Chrome or Apple's Safari on a Macintosh system with the tabbed "writer" theme applied. Because of the "OS Integration" themes the webapp's appearance will be different on other platforms but the general positioning of elements is the same, exept on Android devices where the top and bottom toolbar positions are swapped.
1 Requires either the Android SDK or AppMobi Chrome Extension. A detailed tutorial on both methods is posted in the forums.
2. Server Set-up
Setting up your system for creating a Ryuzine WebApp is actually pretty easy. You must use a web server! This should be a "development server" running on your local network.
2.1 INSTALLATION WITH BUILT-IN SERVER (Mac or Linux)
1. Download Ryuzine PDK and unzip it to where-ever you like.
2. Inside the "ryuzinewriter" folder there is a script named "_start" - run this script and it should start the built-in PHP web development server and automatically launch your default web browser open to Ryuzine Writer.
3. To stop the built-in PHP web server run the "_stop" script within the "ryuzinewriter" folder (this actually kills all running PHP functions).
The built-in server is configured to open as "localhost" on port 8088. This address is only accessible ON the same system running the server! If you need to access the server over your network you will need to configure it to run on the IP address instead. To do this:
1. Open the "_start" file in a plain text or code editor
2. Change: HOST="localhost" to something like HOST="192.168.1.100" (or whatever the IP is)
3. Save the file. Run the "_stop" if you need to, then re-run "_start" and it should open using the IP address instead of "localhost."
4. Use that IP address to access the serve from other devices on your local network.
2.2 INSTALLATION ON DEV SERVER (All Platforms)
2.2.1.a Development Server
⬇ Get XAMPP
- Download it for FREE from here and install it.
- Start the Apache Web (HTTP) server (Ryuzine Writer does not use FTP or SQL)
2.2.1.b Use OS Server
Many operating systems already have web server software included with them. If you don't want to install XAMPP you can turn on the web server that is probably already on your computer and use that instead. Details on how to do so varies from OS to another, and some do not ship with a web server at all, so specific instructions are beyond the scope of this Quick Start Guide. Consult the documentation for your operating system for details on how you can enable the built-in web server and where you need to put your web files.
2.2.2 Install Ryuzine PDK
1. Download Ryuzine PDK and unzip it to your Development Server (XAMPP, MAMP, or built-in Apache server on *nix systems) into the "htdocs" folder. You can rename it however you prefer, but it will be hereafter referred to as the "ryuzine_pdk" folder.
4. Access the "ryuzine_pdk" folder via your development server's URL (either localhost or IP on your LAN). Example: http://localhost/ryuzine_pdk/index.htm
5. You should see Ryuzine Writer load in your web browser. It ships with PHP file operations enabled by default. All your work files should be inside the "ryuzine_pdk" folder (or requisite sub-folders for stylesheets, configuration javascripts, images, fonts, etc).
2.3 Which Browser to Use?
We recommend that you use Ryuzine Writer in Apple "Safari" or Google "Chrome" web browsers. However, here is the full list of supported browsers:
- Apple Safari 6+ (Mac OSX)
- Google Chrome 40+ (Windows, Mac OSX, & Linux)
- Firefox 30+ (Windows, Mac OSX, & Linux)
- Internet Explorer 10+ (Windows)
- Opera 20+ (Windows, Mac OSX, & Linux)
- Microsoft Edge (Windows)
This compatibility list is ONLY for the Ryuzine Writer authoring web app, the Reader and Rack apps have broader support, including mobile devices. We recommend using Safari or Chrome for the best experience.
Note: Ryuzine Writer does have an experimental user interface for mobile browsers but it still has major usability issues so we do not recommend that you use it for production.
2.4 Disable/Clear Browser Cache
Regardless of the web browser you use to run Ryuzine Writer, they all cache copies of documents, images, scripts, etc. When you are editing those files, however, it can be frustrating to reload the document and not see your changes. More than likely it is because the browser is pulling the older, cached version of the file instead of the freshly edited one on the server.
In order to force the browser to always retrieve files from the server instead of the cache you should CLEAR the browser cache at the start of your authoring session and DISABLE it while working in Ryuzine Writer. Exactly how you do these things varies depending on the browser you are using. Do NOT use the keyboard shortcuts that reload/refresh bypassing the cache or it will reload Ryuzine Writer and you'll lose any unsaved work!
Safari - go to Safari > Preferences > Advanced and check the box labeled "Show Develop Menu in Menu Bar." Under the newly appeared "Develop" in the menu bar there are two options of interest. The first is "Empty Caches" and the you should select "Disable Caches" (it will have a checkmark next to it when selected).
Firefox - you can disable the cache entirely by directly editing the configuration settings, or by going to Options/Preferences > Advanced > Network and under "Cached Web Content" tick the "Override" box and set the cache limit to zero. Temporarily disable cache when the Developer Tools panel/window is open just tick the "Disable Cache" under the Advanced Settings.
Chrome - Unfortunately this browser will only disable the cache while the Dev Tools are open! Go to the the "Hamburger" menu in the upper right of the browser window > More Tools > Developer Tools and then on that click the "Network" tab and tick the "Disable Cache" checkbox. To prevent the Developer Tools panel from taking up space in the browser window (which you presumably want dedicated to running Ryuzine Writer) look for the rectangle icon second from the right at the top of the panel. Hold+Click and select the only drop-menu choice to "undock" the panel into a separate window. Again, that window (or the panel) MUST remain open for the cache to be disabled!
Opera - has the same restriction as Chrome where it will only disable the cache while Developer Tools are open. Go to the "Developer" menu and open the Tools panel, tick the "Disable Cache" box and either keep the panel open or undock it and keep it open as a window in the background.
Interent Explorer 10 & 11 - you'll need to have the Developer Tools open as either a panel or an undocked window in the background. Press F12 to open them and under the "Cache" drop-down select "Always Refresh from Server."
Microsoft Edge - again, only works while Developer Tools are open. The only difference in method from IE 11 is in Edge you need to go to the "Network" tab and select "Always Refresh from Server" (also be aware Ryuzine Writer has not been fully tested in this browser).
3. Start Screen
Put Page 5 Content In This Box

The "Start Screen" with shortcut buttons to common tasks
3.1 Sections
At the top of the Star Screen you'll see either buttons, text, or tabs (depending on the theme) that will take you to each Workspace Section. You can also switch between sections on desktop systems by using the following keyboard shortcuts:
- CTRL+SHIFT+HOME = Start Screen
- CTRL+SHIFT+E = Editor
- CTRL+SHIFT+X = Export
- CTRL+SHIFT+S = Simulator
- CTRL+SHIFT+C = Config File Builder
- CTRL+SHIFT+R = Rack Data Builder
- CTRL+SHIFT+H = Guided Help
- SHIFT+ESCAPE = Reload UI
There are situations in which the User Interface may not initialize properly or may end up out of alignment. If that happens you can press SHIFT+ESC to reload the User Interface without reloading the rest of the webapp and potentially losing your work.
3.2 Start Buttons
Start Buttons, which appear in the middle of the Star Screen, are shortcuts to common taks. If the screen width is less than 1024 pixels the Start Buttons are displayed in a single column. Third-party Add-Ons can also add shortcut buttons to this screen.
4. Editor Overview

A) 4.1. File Menu - press this to reveal the drop-down list of options
4.1.1 Clear Editor - clears the composition window so you can start creating a publication from scratch.
4.1.2 New from Template - opens the Template Wizard to create an empty structure of a publication you then fill in with the content.
4.1.3 Document Properties - opens the Document Properties dialog where you can enter information about your publication as well as enable/disable unique elements.
4.1.4 Open Work File - opens an existing Ryuzine source or processed file stored in the same Ryuzine development installation
4.1.5 Save Work File - this only appears if PHP File Operations are available. Presents you with a dialog box to save what you compose in the editor. Saving from this option produces a "Work In Progress" file tagged with the "wip_" in the filename.
B) 4.2. View - switches to "split coding view" which shows both the HTML code and a preview of that code at the same time. Once you've pressed this button a "Refresh" button will also appear alongside it to commit any changes you make in the code editor.
C) 4.3. Format - opens the "Output Options" dialog box, which determines which features your publication will include.
D) 4.4 Build - processes whatever is in the Editor with whatever Output Options were selected and delivers finished Ryuzine publication code.
E) 4.5. Editor Toolbar - typical WYSIWYG editor tools for the rich text editor.
F) 4.6. Page Manager Panel - Use this to add/delete or reorder the pages of your publication.
G) 4.7. Ryuzine Elements - these buttons insert Ryuzine magazine elements into the editor wherever the cursor is located. The buttons showing when you first start Ryuzine Writer are elements for which you can have multiple occurrances.
H) 4.8. Master Styles Panel - You can load a custom stylesheet with this panel. If it has any simple styles that can be parsed out of it they appear in a list within the panel so you can apply them to elements. The intention is that this stylesheet would have the "look and feel" common to all your publications.
I) 4.9. Edition Styles Panel - also called "Issue-Specific" styles this panel also has a corresponding dialog box for creating new styles from scratch.
J) Editor Window - where you compose your text and place your images.
4.1 Editor File Menu
4.1.1 Clear Editor - clears everything in the Editor Compose window, making it ready for a new document. Because it will clear everything and can't be undone it will ask you to confirm the operation first:

4.1.2 New From Template - opens the Template Wizard, which makes it easier to create the framework for your publication than creating it from scratch (see Template Wizard)
4.1.3 Open Work File - From the drop down File menu select this to open and existing project file on your development server. If PHP File operations are enabled it will show a drop-down list of all valid HTML files you can load into the editor. Project files that have not been built into Ryuzine format will be prefixed with "wip_" for "work in progress." If PHP File Operations are not enabled the dialog will show a plain text field, requiring you to know the file name of the document you wish to open.

4.1.4 Save Work File - From the drop down File menu select this at any time while working on your publication to save it as "work in progress" file. You don't have to include the prefix or file extension, they are added automatically. You will ONLY see this option if PHP File Operations are enabled in the writer.config.js file.

Note: Ryuzine Writer is a non-destructive editor in that it doesn't actually "open" the document you select, it imports the contents and leaves the original file untouched. However, if you save a file with the same name as one that already exists it will NOT warn you before overwriting the existing file.
4.1.2 Template Wizard

Template Wizard Dialog
4.1.2.1 Title - the name of your publication as it will appear on the web app splash screen, in the browser title bar, and on bookmarks.
4.1.2.2 Page Count - total number of pages, including front and back covers and inside front and back covers. You can modify this later in the Editor with the Page Manager.
4.1.2.3 Show Webcomic Options - expands options of use for people creating Ryuzine webcomics and manga (see appendix 11.2)
4.1.2.4 Lightboxes - if you plan to embed any detail images indicate how many (the old lightbox system required detail images be embedded in the document, the new ryulightbox can directly link to media without having to embed it).
4.1.2.5 Social Widget - typically you'll want to use the built-in social media widget, but if you plan to use a third-party alternative selecting "custom" will create an element into which you can place the code that loads whatever social widget you prefer.
4.1.2.6 Offline URL - if you are offering your Ryuzine publications as ZIP downloads for offline reading this is where you would provide a link to your website or the online location of the download the person is currently reading. You would generally leave this blank if you were hosting the publication on your web server instead of offering it as a downloadable.
4.1.2.7 Unique Elements - check the elements you want to include in the Front/End matter before/after your publication (you can adjust this later via the Document Properties dialog or in the Editor window itself).
4.1.2.8 Copyright Notice - if you wish to provide a copyright declaration enter it here. It will appear at the bottom of the Splash Screen in the web app.
4.1.3 Document Properties

Document Properties Dialog
4.1.3.1 Title - the title as taken from Splash Title element or <title> tag.
4.1.3.2 Author - optional author information.
4.1.3.3 Copyright - optional copyright notice information.
4.1.3.4 File Format - tells you what kind of a file Writer thinks you loaded. This would be located in the files meta "generator" entry, if it has one. Possible file types are:
- Ryuzine 1.0 - a version 1.0 format file with a corresponding meta generator entry.
- Ryuzine 1.0 (Inferred) - version data is missing, but structure appears to be current version.
- Ryuzine 1.0 (Converted) - version data was missing, but structure was converted to current format.
- Ryuzine 0.0.5.x (or earlier) - version data is missing and structure is too old to convert to current format.
- Ryuzine Rack 1.0 - a newsstand file (you shouldn't try to edit these in Writer).
- Version Data Missing - Writer has no idea what version the document is.
4.1.3.5 Page Count - the total number of pages in the currently loaded document, including front and back covers and inside the front and back covers.
4.1.3.6 Description - a short (155 character or less) description of your publication. This is used for Search Engine Optimization by being placed early in your document where search engines are likely to show it as the summary in search results.
4.1.3.7 Keywords - a comma-separated list of meta keywords associated with your publication.
4.1.3.8 Unique Elements - Here you can enable or disable the various elements that are shown in the "Front" and "End" matter sections before/after your document content.
4.1.3.9 Import Notes - this box is informational only. It will tell you if the file is compatible with the current format, was converted to the current format, or if it was too old to be converted (which should only happen if you have early beta version files).
The "Refresh" button at the bottom of the dialog will pull the information again from the document currently loaded in the Editor window.
The "Submit" button will overwrite any existing data in the current document with what you have in the Document Properties dialog, and add/delete checked or unchecked elements.
4.2 Editor View Menu

If you press the View button you'll get a drop-down menu of view options. From here you can "Split" the Editor either Horizontally or Vertically, showing the Preview pane and a Code Editor view. After you make edits in the code editing window you need to press the "Refresh" button to commit those changes and then you'll see them reflected in the preview window.
If the browser window is wider than it is tall "Auto Split" will automatically split the view horizontally with the code editor on the left and the preview window on the right:

If the browser window is taller than it is wide then "Auto Split" will show the Code Editor on the top and the Preview pane on the bottom:

You can, of course, force it to split either horizontally or vertically by selecting the specific split option from the View drop-down menu. To hide the Preview Pane and go back to the WYSIWYG editor mode select "Reset View" from theView menu.
4.3 Output Format

Before you "Build" your publication you need to decide which features and files will be used. On the Editor workspace press the "Format" button in the top toolbar and a dialog box like the one above will appear.
4.3.1 Natural Language - select the language used in your publication. This doesn't translate your publication, it simply tells the browser what the intended language is so it can make reasonable decisions about what character encoding to use. If having your files validate is important it must include the natural language code.
4.3.2 Preserve In-Page Styles - if you have included any classes inside <STYLE>...</STYLE> tags within your document and you would like them to be preserved either for testing or in the published document check this box. Ideally, however, you should move those styles to your issue-specific stylesheet before publication. When you "Build" a publication with this option checked the Export screen will display a notice informing you that In-Page Styles have been preserved:

If you select the "Custom" options the section will expand to provide you with a text entry box to define the file(s) your publication should use:

4.3.3 Issue Configuration - every Ryuzine publication MUST have a configuration file. Multiple publications can share the same configuration file, or you can have different configurations for each one.
Default - uses the "ryuzine.config.js" file in the /js folder.
Custom - uses the filename you enter. Your custom configuration file must be in the /js folder.
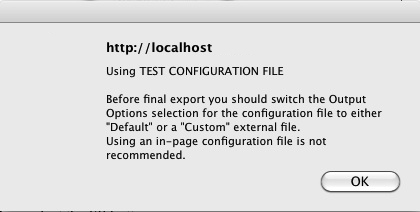
Test - uses the configuration code in the Export > Config box and injects it directly into the Ryuzine document instead of pointing to an external file. When you select this option a notice pops up when you "Build" your publication informing you that it is using a "Test" configuration:
4.3.4 Default Theme - the User Interface for Ryuzine publications can have any of various themes applied to it. The default is the un-themed interface, which also works best if you are using "theme swapping" in your configuration file. However, if you plan to deliver only one theme to all platforms (for example a custom theme you've created that integrates with your website) you can set it here.
Dark - this is the default "un-themed" look for the User Interface. This is also the underlying look and feel if you use a Custom theme and the end user turns it off. This is the "ui_dark.css" file in the /css folder.
Light - an alternative version of the default theme that uses light colors instead of dark colors. this is the "ui_light.css" file in the /css folder.
Custom - enter the name of the theme folder as it appears in the /theme folder.
4.3.5 Issue Styles - every issue will probably have stylesheet coding specific to that issue and this is where you tell Ryuzine Writer what your publication will use.
thisissue.css - this is the default issue-specific file. There is an empty one included you can use as a template for your own issue-specific files.
Custom - typically you'll probably want to name the issue-specific stylesheet with a name that is consistent with the issue's HTML file. This is where you'd enter that filename. The issue-specific file must be located in the /css folder.
CSS Export Box - what this option does is writes whatever code is in the Export > CSS Box directly into the Ryuzine HTML code in between <STYLE>...</STYLE> tags. On building your publication you will see an alert box like this:
You can compose and edit your stylesheet right in the CSS Export Box, however, you should copy the styles into an external issue-specific stylesheet before you publish. If you leave them written directly into the HTML page they may not properly remove when a reader chooses one of the Ryuzine "alternate" Views.

4.3.6 Custom External Stylesheet - lets you inject another stylesheet (example: third-party service or widget). The path can be relative or absolute.
4.3.7 Custom Additional Script - lets you inject another external script into the publication (example: third-party service or widget).
Load Script - sets where the script should be injected into the document:
First - places the script in the <HEAD> tag before any other scripts.
Last - places the script in the <HEAD> tag after all other scripts.
End of Page - places the script just ahead of the </BODY> tag.
Note: javascripts actually load asychronously but sometimes the order in the page can prevent errors. Ryuzine completely rewrites the <BODY> content, which will remove the injected script tag, but the script will load and run before Ryuzine removes the tag.
When you have selected your Output Options hit the "Submit" button. You can continue to edit your publication and "Build" and re-build it without having to re-submit the Output Options (unless you want to change some setting).
4.5 Editor Toolbar
4.5.1 Expand/Collapse Toolbar
![]()
Editor Toolbar Collapsed
The left-most button on the Editor Toolbar ![]() toggles whether the toolbar is expanded or collapsed. While collapsing the toolbar will show fewer tools it also increases the amount of vertical space for the Editor Window and the Editor Panels.
toggles whether the toolbar is expanded or collapsed. While collapsing the toolbar will show fewer tools it also increases the amount of vertical space for the Editor Window and the Editor Panels.
![]()
Editor Toolbar Expanded
4.5.2 Toggle HTML Mode
If you are familiar with HTML code you can toggle the Editor between WYSIWYG and HTML Source modes by selecting the "Toggle HTML Source" button ![]() . This also disables most of the Editor Toolbar buttons and the Panels, since they don't work in Source editing mode anyway. Only Advanced users should use this editing mode because it is very easy to seriously mess up your document if you don't know what you're doing.
. This also disables most of the Editor Toolbar buttons and the Panels, since they don't work in Source editing mode anyway. Only Advanced users should use this editing mode because it is very easy to seriously mess up your document if you don't know what you're doing.
4.5.3 Toggle/Undock Sidebars
If you are working on a narrower screen or simply want more space for the Editor composition window you can toggle the sidebar visibility with the third button from the left ![]() on the Toolbar:
on the Toolbar:

Editor Workspace with Sidebar Panels Hidden
It isn't obvious, but all four of the Panels in the Sidebars can also be undocked and used as "floating" windows over the top of the Editor. Double-click on the Title Bar of each panel to toggle it between Docked/Undocked mode. The Panels will not allow you to drag them off screen and are "tied" to the Editor Workspace, so when you change to another Workspace Section they will not be overlaid on the new Workspace. Panels that are undocked from their Sidebar will not have their visibility changed by the Toggle Sidebars button (it only affects the Sidebars and whatever Panels are currently docked to them). When no Panels are docked the Sidebars automatically disappear and the Editor Compose space is expanded.
4.5.4 Toggle Front/End Matter
You can show or hide these elements in the Editor by pressing the ![]() button in the Editor Toolbar. To delete an element you can just delete it (or all the content inside of it) or you can add/remove these elements from the File > Document Properties dialog.
button in the Editor Toolbar. To delete an element you can just delete it (or all the content inside of it) or you can add/remove these elements from the File > Document Properties dialog.

Unique Elements are those that are optional and are not part of the content of your publication. They are shown in the Editor both before and after the pages of your publication (technically the order they appear in, or whether they appear before or after doesn't matter, they just have to be outside of the pages of your publication).

Each element's content is shown inside a different box with a "flag" showing which Unique Element it is. You can only have ONE of each of these in your document and they must be placed inside of either the "Front Matter" or "End Matter" containers (the dotted line shows where they start/end).
4.5.5 Toggle Table Operations
The Table Operations are only active when the editor cursor is inside an HTML table, otherwise the tools are greyed-out (inactive) and just take up a lot of space on the toolbar. If you know you aren't working with tables you can toggle the visibility of these tool. With the Toolbar expanded look for the "Toggle Table Operations" icon ![]() :
:
![]()
Table Operations Button (darker button)
![]()
Table Operations Buttons expanded, but still disabled because the edit cursor is not inside an HTML table.
4.6 Page Manager I
The Page Manager Panel can be found in the left-hand Sidebar in the Editor. This utility is used to add, delete, and rearrange the pages of your Ryuzine publication. It is also used to change the View for the Editor while you are composing your document.
4.6.1 Selecting/Deselecting Pages
Selected pages have a color overlay and the page number beneath them changes to light color numbers in a black box.
4.6.1.1 Selecting/Deslecting A Single Page - scroll the Page Manager window to the page thumbnail for the page you want to select and click on it. The Editor window will automatically scroll to the selected page. To deselect the page either click on another page thumbnail to change the selection or click on the same page thumbnail again to deselect it.

4.6.1.2 Selecting/Deselecting Multiple Pages - Holding down the SHIFT key click on each page you want to select to create a multiple selection.

4.6.1.3 Selecting/Deselecting ALL Pages - In the Page Manager titlebar there is a "menu" icon with a rightward pointing arrow. Mouseover or tap it to open the panel's "flyout" menu. The first two items on it allow you to quickly select or deselect all the pages at once.
4.6.2 Moving Pages
Rearranging pages is really easy with the Page Manager. Just Hold+Click on the page thumbnail in the panel, drag, and drop it wherever you'd like it to appear.

The page doesn't actually have to be selected. You'll see a semi-transparent version of the thumbnail (with the current page number under it) while dragging it. When you are over a potential drop target (i.e. another page) the border of the target will change to a red dashed outline. In the example image above Page 4 is being moved to where Page 2 currently is. This will put Page 2 to Page 3 and Page 3 will become the new Page 4.
4.6.3 Adding/Deleting Pages
4.6.3.1 Appending A Page - if you just want to add another page to the end of your document click on the single page icon ![]() at the bottom of the Page Manager panel.
at the bottom of the Page Manager panel.
4.6.3.2 Inserting A Page - if you want to insert a page at a specific location in your document, first select a page and then click the single page icon![]() . The new pages will be inserted before the page you selected.
. The new pages will be inserted before the page you selected.
4.6.3.3 Inserting Multiple Pages - click the "Add Multiple Pages" button ![]() at the bottom of the Page Manager Panel and it will open the "Insert Pages" dialog:
at the bottom of the Page Manager Panel and it will open the "Insert Pages" dialog:

You simply enter the number of pages you want to insert and then, from the drop-down menu select whether you want them inserted "at the end of document," "at the start of document," or "before" or "after" a specific page, which you would then define in the last box.
4.6.3.4 Deleting A Page - first select the page you want to delete and then click the Trash icon ![]() at the bottom of the Page Manager Panel. An alert box will ask you to confirm the deletion.
at the bottom of the Page Manager Panel. An alert box will ask you to confirm the deletion.
4.6.3.6 Deleting Multiple Pages - you can hold down the shift key and select multiple pages for deletion too, then click the Trash icon ![]() and confirm the operation.
and confirm the operation.
4.6 Page Manager II
4.6.4 Panel Views
4.6.4.1 Toggle Thumbnails - click on the flyout menu icon at the top of the Page Manager Panel and check/uncheck the box next to "Show Thumbnails" to toggle whether the Page Manager shows miniature versions of the actual page content or blank representations of the pages:

Note: the Page Manager thumbnails cannot currently show the page content with a stylesheet applied to them, so you will only see the un-styled HTML content on the thumbnail image. The "image" isn't actually an image at all, it is a scaled-down duplicate of the page content embedded in the thumbnail and the browser must support CSS3 Transform scaling.
4.6.4.2 Small Thumbnails - click on the flyout icon and select the radio button for "small thumbnails" from the the menu (this is the default size):

4.6.4.3 Medium Thunbnails - click not he flyout icon and select the radio button for "medium thumbnails" to make them a bit larger:

4.6.4.4 Large Thumbnails - click the flyout icon and select the radio button for "large thumbnail" which makes the representations of the pages even larger. This is particularly useful on devices with smaller screens or if you have the resolution set lower or zoomed out your browser's view:

4.6.5 Page Views
4.6.5.1 Single Pages - this is the default view where pages are shown in a linear fashion with set heights. If content overflows the page you will see a scrollbar on the page in the Editor.


4.6.5.2 Continuous - this also shows pages in a linear fashion, but the pages only have a minimum height. If content is longer than that minimum the page stretches to accommodate it. This is designed to look and work exactly like the "Continuous" view in Ryuzine Reader.


4.6.5.3 Facing Pages - this mode shows you how your pages will appear across from each other in Ryuzine Reader landscape view. The pages are shown with a set height and if content overflows them there is a scrollbar on the page. If you are working on a Manga or other document that is traditionally bound on the right you can tick the "Right Binding" checkbox so Facing Pages will reflect the page ordering correctly.


4.6.5.4 Outline Elements - normally the pages in the editor do not show the borders of the individual elements. If you tick this checkbox the Headers are outlined with a dashed red line and the main page body "Live Area" is outlined with a a blue dashed line.


4.7 Elements Panel

ABOUT LIGHTBOXES
If there is no lightboxing add-on or script loaded the default is to display any embedded lightbox content in a full-page Dialog box, and this ONLY works with the new format of lightbox links using <a rel="lightbox"> tags. The older, heavier markup using DIVs is ignored, and any lightbox links directly to media (as opposed to embedded) will simply open them in a new tab/window instead.
The "lightbox" Add-On: The original, integrated lightbox system has been extricated and turned into an optional add-on. This is the lightbox that uses a table-based layout and ONLY supports embedded content. It has, however, been updated to automatically convert any of the new format links and embedded lightboxes backwards to the old format. Direct media linked lightboxes retain their default behavior of opening in a new tab/window.
The "ryulightbox" Add-On: This is the new lightbox system using <a rel="lightbox"> links and <figure class="light_boxed"> and <figcaption> for embedded content, plus it supports direct linking to media, and can optional support content in <iframe> containers (disabled by default). It can also group content into arbitrary "galleries" as well as automatically group all single links into a gallery (if you enable it in the add-on's config file). Lastly, if your Ryuzine publication does still have old format lightbox links in it this will automatically convert them on-the-fly into the new format. The "ryulightbox.config.js" file has two configurable options in it, the first determines whether or not single lightboxes are grouped into an automatic gallery and the second enables support for <iframe> content such as other websites or embedded video from sites like YouTube, Vimeo, etc. Be aware that <iframe> content can be problematic on mobile devices (that's why it's disabled by default).
Third Party Lightboxes: You could also use any third-party lightbox script you want, so long as either your links and content are in whatever format it requires or you create an Add-On of your own that converts existing links to the proper format. The "Lightbox Link" dialog in Ryuzine Writer (under the "Ryuzine Elements" side panel of the editor) allows you to easily change what "data-" attributes are written into the links, so you also are not limited to authoring in only the "ryulightbox" format (though it doesn't save your custom format beyond the session).
4.7.1 Lightbox Link
To help you create links to light boxed items place the cursor in your document where you'd like to insert the link and press the "Lightbox Link" button in the Ryuzine Elements Panel. The intended use is to wrap a thumbnail image in the link, but you can also select text. A dialog box will open:

Link URL - if this is an anchor link make sure you embed a Lightbox Item with the corresponding ID in your publication. Otherwise it can be a direct link to media (note: the "lightbox" add-on supports only the former, the "ryulightbox" add-on supports either).
Link REL - to work with the "lightbox" and "ryulightbox" add-ons this should be "lightbox" (unless you changed it to something else in the ryulightbox.config.js file), however if you're using some other lightbox script you may need to enter a different name.
Layout - you can adjust how the light boxed item will be scaled. Landscape will fit the content by width, Portrait will fit it by height.
Link Type - both the "lightbox" and "ryulightbox" add-ons create small icons in the lower corner of Lightbox Link Thumbnails which can be customized to indicate the type of media that will open in the corresponding lightbox. Select it from the drop-down list.
Note: if the selected content is not an image no link type icon will be shown. Text links to light boxed content will appear as regular links.
Class Name(s) - if you have any other custom styling you want to apply to your lightbox links enter the class name(s) here.
data-linkid - an alternate means of targeting embedded lightbox items by ID if, for any reason, you need to enter something other than an anchor link as the URL.
data-gallery - you can group lightbox items into arbitrary "galleries." Each item can belong to only one gallery. Enter the name of the gallery to which the target lightbox item belongs. The "lightbox" add-on does not support galleries, the "ryulightbox" does.
title - optional title for this link, may be picked up by screen readers and/or shown as a context message.
data-caption - if you are using the "ryulightbox" add-on to direct link to media, this is where you would enter the (optional) caption for the item. Direct linked media without captions will show the URL of the item being shown instead.
Note: if you are using some other lightbox script the data parameters of the link may need to be changed. The "pencil" icon indicates you can click on the parameter name and edit it if necessary.
4.7.2 Lightbox Item
A lightboxed item is simply a <figure> block tagged with the class "light_boxed" and may or may not also have a <figcaption> inside of it. It must have the class "light_boxed" to be interpreted as a light box container because it is possible you may have figures in your document that are NOT light boxes. So all <figure> blocks are not light boxes, but all light boxes are <figures>. You should only use this for embedded lightbox content.

4.7.3 Lightbox Caption
If you create a Lightbox Item from the Ryuzine Elements Panel it will automatically be created with a Caption block inside of it. However, if you accidentally deleted it or want to add additional captions to it, position your cursor inside the Lightbox Item block and press the "Lightbox Caption" option in the Ryuzine Elements Panel to add an empty caption block. Caption blocks are simply a <figcaption> tagged with the class "caption" and must be located inside of a <figure> block. If your cursor is not inside of a <figure> block you will see this alert:

4.7.4 Dynamic Thumbnail
You can either place your cursor where you wish to insert a dynamic thumbnail, or select an image to wrap in dynamic thumbnail code block. Dynamic thumbnails are an optional method used to swap out low and high resolution images for different display densities using CSS and unique element IDs. (See Dynamic Images in Appendix).

4.7.5 Dynamic Image
You can either place your cursor where you wish to insert a dynamic image, or select an image to wrap in dynamic image code block. Dynamic Images are an optional method used to swap out low and high resolution images for different display densities using CSS and unique element IDs. (See Dynamic Images in Appendix).

4.7.6 OVR Image
OVR stands of "Object Virtual Reality." It is a script which creates a rotate-able 3D object from a series of still images taken at intervals around an actual or rendered object. You only need to place the first image of the sequence in your document and then wrap it in the OVR container, telling it how many total frames make up the animation. Because OVR images take over the left/right gestures on a touch device they can only be inserted in embedded light boxes in your Ryuzine document.

Your Ryuzine publication must also load the optional "ovr" add-on, otherwise all your readers will see is the static first image of the animation sequence.
A detailed explanation is beyond the scope of this manual, please see the full documentation at the OVR project website.
4.8 Master Styles Panel

Master Styles Panel
For an explanation of what "Master Styles" are please see Appendix section 11.1.
4.8.1 Import Master Stylesheet
To import an existing stylesheet from your development environment click on the folder icon![]() in the pane's footer and a dialog box will open:
in the pane's footer and a dialog box will open:

Assuming PHP File Operations are enabled you will see a drop-down list of all the available stylesheets in the development server's /css folder. If PHP File Operations are not in use you will only see an empty text entry box and will need to already know the filename you wish to import.
Depending on the structure of the stylesheet you may see several Alert boxes pop up informing you what rules were found that the panel cannot import. Whatever could be imported will be displayed as a list in the panel. The stylesheet will also be applied to the document currently loaded in the Editor.
If you are not using a separate edition styles then the Master Styles stylesheet would also serve as the edition styles.
4.8.2 Auto-Import Master Styles
1. You can set a stylesheet to be automatically imported to the Master Styles panel every time you load Ryuzine Writer. Open the /ryuzinewriter/js/writer.config.js file in a plain text or code editor and enter the filename of the stylesheet for the "importStyles" variable.
2. Make sure that the "Auto-Import Master Styles" switch in the Writer Options Panel is turned "On" or the stylesheet will not be loaded automatically.
4.9 Edition Styles Panel

Edition Styles Panel
For an explanation of what "Edition Styles" are please see Appendix section 11.1.
4.9.1 Import Edition Stylesheet
Just as you can with the Master Styles Panel, you can import an existing stylesheet to the Edition Styles Panel too. Press the folder icon ![]() in the footer of the panel and you will see a dialog box:
in the footer of the panel and you will see a dialog box:

If PHP File Operations are enabled you will see a drop-down list of all available stylesheets on your development server. If file operations are not available you will see a text field and must know and enter the filename manually.
After clicking the "Load File" button you may see a series of Alert boxes informing you what elements were found that could not be imported. Whatever could be imported will be displayed as a list in the Edition Styles Panel.
4.9.2 Add New Styles
Unlike the Master Styles Panel, the Edition Styles Panel allows you to create and add new styles to the panel. Press the page icon with the "P" in it ![]() in the footer and the Add New Styles dialog will open:
in the footer and the Add New Styles dialog will open:

The dialog is divided into three tabbed sections for "Font," "Object," and "Effects" styling. On the left side of the dialog you can see the style code being generated as you select and change options under each tab. If you are familiar with CSS code you can simply write your rules in the "Style Code" box on the left and "Submit," but for most users letting the dialog automatically generate them as you pick options will be more convenient and less prone to errors.

Under the "Object" tab you'll see many of of the options have "Top, Bottom, Left, Right" options with a chain link in the middle. When the link is closed the four boxes are ganged together so that changing the value in one is automatically reflected in the three others. Click the chain icon to "unlink" the boxes from each other if you need to enter different values for each side.
You'll also notice some have a checkbox for the entire sub-section too, which allows you to enable/disable including or excluding the parameter in the generated rule.
On the "Effects" tab you'll see a number of settings for adding text shadows, box shadows, or transform effects to the text or object to which the rule you are creating will be applied. Do not rely on the effect being applied since not all effects are supported by all browsers.
When you are satisfied that you have defined everything you need to about the new rule click the "Submit" button and you should see it appended to the end of the Edition Styles list.
4.9.3 Delete/Edit Styles
4.9.3.1 Deleting Styles - there are two ways to delete a style from the Edition Styles panel. The first way is to select the style in the panel's list and then click the trash icon ![]() in the lower right of the panel. Once a rule is deleted it cannot be undone! You can also delete a rule by changing to HTML Source mode
in the lower right of the panel. Once a rule is deleted it cannot be undone! You can also delete a rule by changing to HTML Source mode ![]() , finding the CSS code block for the rule you want to delete, and removing it.
, finding the CSS code block for the rule you want to delete, and removing it.
4.9.3.2 Editing Styles - once a style has been imported/added to the panel the only way to edit it is to change to HTML Source mode ![]() , find the CSS code block for the rule(s) you wish to edit, and manually editing the block before returning to WYSIWYG mode.
, find the CSS code block for the rule(s) you wish to edit, and manually editing the block before returning to WYSIWYG mode.
5. Export Overview
Put Page 7 Content In This Box

A) 5.1 Save Menu
This drop-down menu only appears if PHP File Operations are enabled and it allows you to save individual component files for your Ryuzine Publication or "package" your publication into a single folder or ZIP file.
 5.1.1 Save HTML
5.1.2 Save CSS
5.1.3 Save Config
5.1.4 Save Rack Catalog
5.1.5 Build Package (see 5.4)
When saving individual files you do not have to include the path or the file extension. The correct extension will be added automatically and the file will be written into the correct location (be aware if you give the file the same name as one that already exists the existing file will be overwritten without warning and cannot be restored). All of the individual file save dialogs have a similar appearance and functionality:

The "Save HTML" dialog also has a built-in safeguard that will not allow you to call your working file "index" because the Ryuzine Writer web app itself is the "index.htm" file within your Ryuzine development environment:

Note: If PHP File Operations are not enabled the Save button and menu are not shown. The only way to "save" your work is to select the generated code from each box in turn, copy it to the clipboard, open a text or code editor application, paste the code into an empty document and save it. This is because, without the help of the PHP Server, Javascript has no built-in way to generate or save a file.
B) 5.2 Preview Button
If you have hand edited any of the code in the export text boxes you can preview a test build using that code by pressing Preview, which will then take you to the Simulator. This way if you've edited the code in the boxes you can see if it will work before you save your work.
C) 5.3 Tab Sections
Each of the main files used by a Ryuzine publication has the code generated by Writer written into one of these four boxes.
D) 5.3.1 HTML Box - this is where the processed Ryuzine format code is output from the editor when you "Build" your publication.
5.3.2 CSS Box - if you are using In-Page styles they will be written into this box so you can save them into an external stylesheet file.
5.3.4 Config Box - when you use the ConfigBuilder the customized configuration code will be formatted and output into this text box.
5.3.5 Data Box - when you use the RackBuilder to create or edit a Ryuzine Rack Data Catalog the HTML code will be output to this export text box.
5.4 Build Package Dialog
The Build Package Dialog (not shown) has numerous options for how to package your Ryuzine publication (see Build Package section).
5.4 Build Package
Important: Package Building is only available if PHP File Operations are enabled and your server has the PHP ZIP extension installed.

If, as recommended, you are using XAMPP or the built-in PHP server for your development environment you are good to go.
Go to the Export workspace and press the "SAVE" button in the upper left. On the drop-down list the last item is "BUILD PACKAGE" which, when selected, opens the Packaging Wizard:

Build Package Dialog with Standard Package Selected
5.4.1 Overview
The Build Package Dialog is divided into three different areas. At the top you have radio buttons to choose which kind of package you want to build.
The second area are the options shared by all package types. This actually gets split into two sections above and below if Custom package type is chosen.
The last part is the "Output Console" which gives you feedback from the server during the building process and if anything goes wrong will show the server error message(s) so you can hopefully figure out how to fix the problem.
5.4.1.1 Shared Options
Title - this is usually going to be pre-populated with the title extracted from the Ryuzine file, but if it is blank simply enter a name. It is integrated into the package file name.
Include Ryuzine Publication - you can save either a Ryuzine publication, a Ryuzine Rack, or both in a package. Check this if your package will include a publication.
Issue-Specific Images - from the drop-down list select the name of the folder that contains images for this publication. If you are packaging a Ryuzine Rack without a publication this setting is ignored (Ryuzine Rack's image folder is always called "rack" and does not need to be selected).
Include Ryuzine Rack - if this package will include a Ryuzine Rack newsstand check this box. Packages can contain either a publication, a newsstand, or both.

When you check the box to include Ryuzine Rack it reveals additional options:
Set as Index - if you want to use Ryuzine Rack as the front-end interface for a package containing multiple publications or if the only thing in the package will be Ryuzine Rack (i.e., distributed as a catalog) check this box.
Catalog Source - catalogs are simple HTML files in the /data sub-folder
All Catalogs - all catalog files in /data will be bundled in the package.
Export Box - grabs the built code from the Export > Data box and reveals a text entry box for you to give the saved file a name.
Server - reveals a list with checkboxes so you can select individual catalogs to include.
Image Folder - if the box is checked all the sub-folders for all catalogs will be included in the package. Unchecking the box will reveal a list with checkboxes to select individual folder of catalog images to include in the package.
Skip ZIP Archiving - if you plan to make manual modifications to the package, or will not be distributing it as a download, or will be hosting it on a website and want to upload the folder and files without archiving, check this box and it will only copy all the relevant files into a folder on your development server.
4. Build - when you are done setting your package preferences hit the "Build" button and let the program go to work!
5.4.1.2 Output Console
You can selectively show or hide the Output Console window by clicking on the "Show" or "Hide" text just above the console window. Note that this is not a true console/terminal window, it only shows server activity specific to building a Ryuzine publication package and you cannot enter line command in the window.

Output Console before Build
The "Output Console" at the bottom of the dialog tells you what the web server is doing after you hit the "Build" button:

Normally the way this works is, at the end of building, Ryuzine Writer will try to get your web browser to automatically download the ZIP file from your development server to whatever device you're presently using. The ZIP archives will remain on the development server until you manually delete them. If you skipped the ZIP archiving there will be a plain folder on your development server instead and no file download is triggered.
If you have problems with your browser not downloading the ZIP file at the end of the process, or you just prefer that it not be automatic, you can change this functionality in the /ryuzinewriter/php/functions.php file by opening it in a plain text or code editor and changing the "AUTO_DOWNLOAD" variable to "0":
 The next time you run Ryuzine Writer and build a package the Output Console will, instead, show you a click-able link to manually download the file instead of trying to auto-download it:

The link will remain in the Output Console of the dialog until you build another package or close Ryuzine Writer. The file to which the link points will remain on your development server until you manually delete it.
5.4.2 Smallest File Size
This is a really bare-bones package that will include just the minimum files to make your publication work in Ryuzine Reader. The end package will contain:
⃠ No Add-ons
⃠ No Themes
⃠ No Catalogs
⃠ No Web Fonts
⃠ No Source Code
It will contain only the publication's HTML file, the image folder selected from the drop-down list, the stylesheet defined in the Output Format dialog or the default "thisissue.css" stylesheet, and the configuration file defined in the Output Format dialog or the default ryuzine.config.js configuration file.
5.4.3 Standard Package
The "Standard Package" will automatically contain the files most people would probably want to include when packaging their publication, which includes (of course) the publication's HTML file, your Master and/or Edition stylesheets, your custom configuration file (or the default one if you don't have a custom one), and the following extras:
✚ Recommended Add-ons
✚ OS-integration Themes
✚ All Web Fonts
⃠ No Source Code
5.4.4 Custom Package
If you want total control over what files go into your package and what the file names will be then select Custom Package, which gives you granular options for everything a package might contain.

Custom Package REQUIRED Settings
In addition to the Shared Options all packages use, clicking the "Custom Package" radio button expands the dialog considerably to show many new options.
Preserve Editor Thumbnail Images - when the Editor is using PHP File Operations it also uses the "Insert Image" dialog, which creates thumbnail images of every file you browse. Odds are you don't want to include these extraneous files in your publication so normally this box is unchecked. However, the Editor does allow you to navigate into that thumbnails folder so it's also possible you placed the thumbnails in your document too - in which case you'd want to preserve the folder in your package so readers wouldn't see broken image links.
Ryuzine File - choose the source for the publication file to include in this package. It will either be the HTML code in the Export Box (presumably recently generated) or it will be an existing file on your Server (saved as a single file during a previous session). If you select "Server" a drop-down box will appear from which you can select the file. The "Save As" text box allows you to customize the name of the file as it will be included in the package.
Configuration File - the default file is always the "ryuzine.config.js" file, which you may or may not have edited. The second option will take whatever code was generated by the ConfigBuilder and written into the Export Config output box. The third option, "Server," will show you a drop-down list of available configuration files on your server. Again, as with all the Custom options, you have control over what filename will be used in the package.
Issue-Specific Stylesheet - this will include either the default "thisissue.css" file, the code in the CSS Export box, or you can select an existing stylesheet on your server. This would be your Master Styles stylesheet. If you are using Edition Styles those are added later.

Additional Includes for a Custom Package
The next section of the Custom Package dialog options allows you to pick what, if any, other items will be included in the package.
Fonts Folder - if your publication uses any custom web fonts they should be in your /fonts folder of your Ryuzine development server. The simple solution is to just include "All Fonts" and the entire contents of the folder will be copied. However, if you only used one or two custom fonts in the document and the folder has a dozen or more, you should probably include only the fonts you actually used instead.
You'll notice it includes both "Font Folders, " which may have many fonts inside of them, as well as stylesheets and license files, etc.; and "Loose Fonts" which are inside the main "Fonts" folder but are not organized inside of any sub-folders.
Add-Ons - you can safely check "Include All-Addons" whether your configuration file is set to use all the add-ons or not. However, if you'd prefer your package doesn't potentially include Add-Ons you don't even use in your publications you can select just the ones you've enabled in your configuration file.
Theme UI - if you are using the "OS Integration Themes" that delivers different themes to different platforms you can select which theme(s) to include in the package here. Or include all of them. It's up to you!

Custom Package Extras
The last section of the Custom Package dialog options are for extras you may or may not want or need to include.
Custom Script - if you are using some third-party widget or an alternative lightbox script, etc., you may need to include a custom script for it. If you entered a custom script in the Output Format dialog in the Editor it will automatically appear here as well. The file name you give should be identical to the file name on the server so the Package Builder can find and copy it into the package.
Custom Stylesheet - if you entered a custom stylesheet in the Output Format dialog in the Editor it will automatically also appear here. If you are using both Master Styles and Editor Styles the "editor styles" stylesheet would be in this box. The filename must match the file on the server so the Package Builder can find and copy it into the package.
Include Source Code - publishers are NOT required to include source code for Ryuzine Reader or Rack in their distributions. Normally (under Small and Standard Package) the source code files are not included. However, when you create a Custom Package you have the option of including the source code files.
6. Simulator Overview

A) 6.1 Device Selector - drop menu of available Device Profiles you can show in the Simulator.
B) 6.2 Add Device - allows you to create and add temporary Device Profiles (see Add Device)
C) 6.3 Rotate - swaps the simulated device orientation between landscape and portrait.
D) 6.4 Simulator View Menu - adjusts the how the simulation is presented (see Simulator Views section).
E) 6.5 Zoom Factor - scales the simulated device/screen up or down or to fit the available space.
F) 6.6 Load URL - allows you to check the responsive layout of other websites and see how they might appear on the targeted Device Profile. Simply enter the absolute URL path in the dialog box:

G) 6.7 Simulated Device - depending on the selected Device Profile and View settings what you see in the main area of the simulator will vary. The simulation only tries to approximate the size of the device display, not any of the functionality of the actual device.
6.2 Add Device Dialog
While the Device Selector has a lot of devices from which to choose, and there are Add-Ons that include even more, you may want to create a custom Device Profile for some off-brand device or new version of a device that is not included in the list.
Be aware, however, that this only adds the custom Device Profile to Ryuzine Writer while running in the current web browser, because the custom profile is saved in a browser cookie file. If you want your custom profile(s) to be available in other browsers and/or on other devices on your network - or to share the profile with other Ryuzine Writer users, you will need to instead create a "Skin" file.

Add Device Dialog (Collapsed)
6.2.1 Device Name - enter any name for the device you like (it can even be the exact same name as an existing device in the list, they will be treated as separate Device Profiles).
6.2.2 Device Profile - device types fall into one of two broad categories, they are either a "phone" or a "tablet" (most "phablet/tabphone" large screen devices are still phones). Really all this will do is determine which images are used to represent the Operating System and Browser View elements, and the default orientation of the device in the Simulator.
6.2.3 Device OS - this drop-down only shows the more recent versions of the operating systems. Add-Ons might have their own, additional, OS simulator files.
6.2.4 Custom Skin - If this is just an update to an existing device and the "skin" of an existing device will suffice, you can simply point it to the existing skin folder and reuse it (for example, all iPads use the same rendered screen size and the devices are visually similar, so you could reuse "ipad_air" for any future iPad releases).
6.2.5 Skin Folder - simply enter the name of the skin folder here (the path will automatically be ryuzinewriter/skins/ )

Add Device Dialog (Custom Sections Expanded)
If you select "Other OS" from the Device OS drop-down the dialog will present you with a box into which you can enter the name of the OS Profile. If you know the profile already exists you can answer "No" to "Set OS Elements" because they will be defined in the OS Profile files. If you know there is no OS Profile for the operating system select "Yes" and in the three boxes below that enter the Status Bar, Top Toolbar, and Bottom Toolbar heights in pixels to simulate the space these would take up in "Browser View."
If you select "No" for "Custom Skin" you will be presented with two boxes into which you can enter the RENDERED screen width and height in pixels for the simulated device. It is important to understand that the actual screen size in pixels may have nothing to do with the rendered size. If you have access to the actual device there is a Screen Size utility included with Ryuzine Writer (in ryuzinewriter/skins/screensize.htm). Simply load it in the device's browser over your LAN and make note of the pixel sizes it reports.
Add-Device Walkthrough: Amazon Fire Phone
As an example of how to create a custom device profile we are going to create one for the Amazon Fire Phone. While the Kindle Fire HDX tablet was included in the default device list the Fire Phone was not, because so few people actually own one. But let's say you want to see how your publications will look on one anyway, so let's create that Device Profile!

We enter "FirePhone" as our Device Name, select the "Phone" radio button (because it's a phone) and because FireOS isn't on the drop-down list we select "Other OS" which shows us the custom options. We enter "FireOS" for the operating system name and say we do NOT need to "Set OS Elements" because we know there is already a Kindle tablet Profile the FireOS elements are already defined in the ryuzinewriter/skins/os/images/FireOS/ folder.
We don't need an actual picture of a Fire Phone for the simulation, but we DO need to enter the screen size correctly. The Amazon Fire Phone has a 720x1280 pixel screen with a pixel density of 2.0. That means everything on the screen is scaled up by a factor of 2x, so we must divide the actual pixel size in half - which gives us the RENDERED screen size of 360x640 pixels. Once we hit "Submit" our Device Profile is added to the drop-down Device Selector list:

There it is right at the bottom! So we change our Device Profile from "iPhone 6" to our new "FirePhone" and in the simulator we see this when we enable Browser View:

As you can see the screen is surrounded with a vaguely phone-like bezel (this isn't an image, it's CSS and is used whenever an Skin doesn't include an image of the device. Phones get a red surround and tablets get blue). You can also see that with Browser View enabled the simulated screen is showing the browser address bar, back and next buttons, and tab selector (unfortunately they are overlaid on Ryuzine Reader page navigation controls, but users can still turn pages by tapping the left or right margin of the screen or swiping left/right).
Creating custom Skins for the Device Simulator is beyond the scope of this manual.
6.4 Simulator Views
 The Simulator Views menu offers you several different ways to display your publication on the simulated device.
6.3.1 App View
The default view for all devices is the "App View" mode. This would be how the Ryuzine web app is displayed on the device when it is being shown "full screen" and browser controls are being hidden. On iOS devices this would correspond to how the web app looks when bookmarked to the home screen and subsequently launched from the bookmark.
 |
 |
| App View | Browser View |
6.3.2 Browser View
Browser view is how your readers are most likely going to initially see your publication. This view setting shows how the Ryuzine web app appears when displayed inside the device's web browser, with the usual browser controls being shown.
6.3.3 Device View
This forces the Simulator to use the Device Profile Skin (the surround that looks like the device). It would inherit whatever the previous App or Browser view setting was.
6.3.4 Screen Only
This forces the Simulator to display ONLY the simulated screen and not the Device Profile Skin. It inherits whatever the previous App or Browser view setting was.
6.3.5 Fill View
This pops the device screen out of the Simulator and fills the entire browser in which Ryuzine Writer is currently being used. Assuming you are on a desktop computer this would show you how your publication - once built and exported/packaged - will look in the browser and on the device you are currently using. Once you enter "Fill View" mode there will be a small "tab" at the top, center of the browser window:
![]()
Simulator Drop Bar Tab
Clicking on that tab will drop the control bar to switch back to "Device View" in the Simulator or reload the current simulation:
![]()
Simulator Drop Bar (Lowered)
The actual size and appearance of the Simulator Drop Bar will vary depending on what theme is applied to Ryuzine Writer. Here is the default appearance if no theme is applied:
![]()
Simulator Drop Bar (Default Appearance)
When you select "Device View" it will close the filled view and return you to the Simulator Workspace and whatever the last selected Device Profile was.
Note: If you are previewing a Ryuzine Rack and are using the configuration setting to open Rack links "in-app" you will rather confusingly have two drop-tabs layered on top of one another in Fill View mode. The topmost one will be Ryuzine Writer's Simulator Drop Bar and the one under that (which would be rendered inaccessible) would be for the simulated Ryuzine Rack's "In-App Drop Bar." Therefore it is not recommended you use the "in-app" setting for Rack links when previewing Ryuzine Rack in Simulator Fill View.
7. RackBuilder

RackBuilder Editing Data Catalog
A) 7.1 File Menu

7.1.1 New Rack Catalog - The first option will clear the RackBuilder workspace and create a new Data Catalog with one row to help get you started.
7.1.2 Load Rack Catalog - The second option is to load an existing Catalog file from your server:

If PHP File Operation are enabled you'll see a drop-down list of all available data catalogs. If file operations are not enabled you'll see an empty text entry box, requiring that you know the filename and can enter it manually. Note that the catalog file location has moved in version 1.0 from /data/cat to just /data so if you have existing catalogs you want available you'll need to move them to the new location.
7.1.3 Save Rack Catalog - opens the same dialog as the one on the Export workspace so you can save the current catalog you are editing.
B) 7.2 Add Item
This is just a simple button that will append another row for a new item to the currently loaded data catalog.
C) 7.3 Edit Menu

7.3.1 Add Rows - opens a dialog box in which you can select how many rows you'd like to append to the current data catalog. This is simply for convenience of not having to hit the "Add Item" button multiple times:

7.3.2 Edit Media Types - the media types are presented in the Rack Builder as drop-down lists from which you can select the type of media the item represents. Since Ryuzine Rack supports promoting more kinds of media than just Ryuzine publications you have total control over what the media types are, what it says on the buttons under the items in Ryuzine Rack, and how many different kinds there are.
These are specific things like Ryuzine format, PDF file, a ZIP download, a link to a Print on Demand book sales page, or a specific web URL. The entries are synchronized with the ConfigBuilder > Rack section (they open the same dialog):

7.3.3 Edit Categories - categories are more general than the Media Types are. Instead of "PDF" the category might be "Newsletter" or "eBook." The dialog for editing categories is very similar to the one for Media Types, but it does not have button label entries:

D) 7.4 Build
When you are satisfied with your data catalog you press build and everything in the Rack Builder workspace will be properly formatted and the code will appear in the Export > Data text box. From there you can save the file.
E) 7.5 Preview
This is a new feature in version 1.0. At any time while you're working on your data catalog you can "test build" it and see what it looks like in Ryuzine Rack via the Simulator. The Ryuzine Rack HTML code will also be loaded into the Editor, but you shouldn't edit this file unless you know what you are doing. You can edit and rebuild the preview as much as you need to make sure your catalog is correct before you save it.
If you loaded an existing catalog file Ryuzine Writer keeps track of the filename so it can pull images for the Preview from the correct subfolder. If you didn't open an existing file and haven't saved your catalog yet the Preview will prompt you to tell it the name of the folder (inside images/rack/) where the catalog's images are located.
F) 7.6 Column Headers
The text not he column headers of a data catalog can also be edited. This is useful, for example if you want to organize them with other terms or need to enter them in a different language:

You cannot add, delete, or rearrange the columns. Ryuzine Rack expects these columns in this order, but doesn't require any specific header text for each column.
G) 7.6 Edit Item

When you click on a text field in the RackBuilder it will expand so you can see what you are typing and (depending on the browser) you may also be able to resize the box to your liking. Functionally, this is very similar to how spreadsheet applications work.

For the cells that limit the options you will see a drop-down list from which you can pick the data for that cell (you can customize what appears on the drop-down lists via the Edit Media Types and Edit Categories dialogs).
H) 7.7 Delete Row

The "X" at the end of each row is how you delete that row from the data catalog. Press it and an alert box will pop up asking you to confirm the deletion. After you delete a row the item IDs are re-factored. Row deletion cannot be undone. However, if you loaded a data catalog remember that Ryuzine Writer is a non-destructive editor. You are never working on the actual file you loaded, you are working on a copy of the file and to "destroy" the original file you would have to purposely overwrite it by saving your edited file with the same name.
7.8 Catalog Branding
It is also possible to "brand" each catalog with a different logo image, further allowing you do distinguish between different catalogs. This feature was previously called the "Masthead Image" and used to appear as a banner above the Promotions Carousel in Ryuzine Rack. These have now been moved to replace the "App Logo" in the Ryuzine Rack navigation bar. If a catalog is loaded that doesn't have its own branding then the App Logo is restored. If no App Logo or Catalog Branding is set the navigation bar will show the title of the newsstand.
The text entry box for this in RackBuilder was removed because it a) is a feature only a small number of publishers are likely to use and b) was apparently confusing, leading people to believe every catalog had to have a "masthead image." So now, if you want to add/edit one to your catalog you should:
- Finish editing the rest of your catalog file in Rack Builder
- Build your catalog file
- In the Export > Data box look for the cell with ID "masthead" and put the filename of the image in it (as shown below)

If this is a feature you find yourself using often, and/or want to avoid manually editing the catalog data file in the Export box there is an optional add-on called "brand_catalog" that will restore the text entry box to the RackBuilder interface so it works just as it did in previous beta versions of Ryuzine Writer.
7.9 Catalog Images
Organizing catalog images has changed significantly from the beta versions. In those you could put the catalog images almost anywhere in a package, but you also needed to include both "standard resolution" and "Hires" versions for high-density screens, and it if you left the paths the untouched in the config files all the images from every catalog would end up mixed together in one folder.
Version 1.0 brings some consistency and better organization to catalog images. Now the only place for catalog images is organized in subfolders with in the images/rack/ folder. The subfolder name must be the same as the catalog filename (minus the ".htm" on the end).
You also no longer need to include two different image sets to accommodate high-density displays. Cover Art thumbnail images should now be 300px wide and custom Promotion banners should be 1280px wide - if you want them to be clear on high-density displays. If file size and bandwidth are of greater concern to you (and you don't mind if the images are slightly blurry on high-density displays) you can use 150px wide cover art and 640px wide custom promotional banners. Or mix and match. Whatever size images you provide they are scaled to fit the interface.
8. ConfigBuilder
The easiest way to create custom configurations for Ryuzine Reader is to use the "ConfigBuilder" utility in Ryuzine Writer. It will ensure your configuration code is formatted correctly.

The main parts of the Configuration File Builder are:
A) Reset - returns all the values of all the sections to their default settings.
B) Build - processes all the values of all the sections and builds the config file code, after which you are taken to the Export > Config workspace.
C) Tabs - there are a lot of settings in the configuration file, which can be a bit overwhelming, so they are divided into sections. Navigate to each section using the tabs.
You only need to touch the settings you actually want to change. Any unaltered settings will simply use the default value for that option.
8.1 Pages Tab

8.1.1 Generate Minified File - check this box if you don't plan to edit your configuration file afterwards. This option will create a "minified" file with spaces, comments, and line returns removed from it. Minified files are smaller and load faster, but they can be very difficult to edit because they are hard to read.
8.1.2 Binding - most of the time you'll probably leave this on "Left" binding, as is common for publications in the West. The "right" binding option was added to support creating online manga, which is traditionally right-bound.
8.1.3 Page Size - the default is "Square" (actually closer to 4:3) ratio, like most magazines. "Comic Book" is a slightly taller and narrower virtual page, and "Fill All" literally fills all the available space regardless of the aspect ratio.
8.1.4 Zoomable - You will typically want to leave this "On" so users on mobile devices have the option to enable the Zoom & Pan mode in the web app.
8.1.5 Maximum Zoom Amount - determines how much magnification is allowed when zooming.
8.1.6 Page Slider - default is "Off" in which case a button is shown that opens a Table of Contents panel. If seeing a table of contents isn't that important (for example, with webcomics) you can turn this "On" and readers will be presented with a thumb slider for quick navigation through the pages of your publication (users can change this to their own preference in the web app's Options Panel).
8.1.7 View Animations - when switching the web app between different views the default is to slide the publication in and out. Turning this "Off" causes the new view to "pop" into view instead (this was necessary on some older mobile devices).
8.1.8 Default Bookmarks - the main purpose of the Bookmarks Panel is for readers to keep their place in a publication. However you can also Add/Edit default bookmarks that will always appear in the panel (they default to Ryu Maru's website).
8.2 Add-Ons Tab

You can easily enable/disable individual Add-Ons by check or unchecking the associated box. If you have one add-on with a dependency on another you can change the order in which they load by changing the order in which you check them. The current load order is shown below the list of Add-Ons.
8.2.1 User Interface Language Localization - this ONLY works if you also load the "Localize" add-on or this is ignored, and the drop-down list only shows the languages the add-on currently supports. However, you can easily add your own custom localizations to support additional languages.
8.2.2 Swap Themes - the Ryuzine web apps feature the ability to deliver different themes to different platforms. If you turn this "On" then the Platform Themes will be used.
8.2.3 Platform Themes - this series of drop-down lists shows all of the currently installed themes. You can define which theme (if any) will target a specific platform when "Swap Themes" is enabled.
8.3 Rack Tab

The Config File building utility has a sub-section specifically for configuring the Ryuzine Rack newsstand app. Ryuzine Rack can use the same configuration file as Ryuzine Reader publicatins in the same folder, or you can assign different configuration files. If you use a configuration file specific to Ryuzine Rack you can safely ignore the options for the reader app.
8.3.1 RyuzineRack Title - The default title is simply "Newsstand" but you can easily customize your newsstand's name by entering something else in this box.
8.3.2 Rack Data Catalogs - Ryuzine Rack uses a basic HTML <TABLE> in place of a back-end database, stored in a standard HTML file. The HTML TABLE is loaded as a "Catalog" and processed into the search results shown in the newsstand app. You can have as many catalogs as you like and easily build them - ensuring the proper format - with the "Rack Data Builder" utility.
Catalog files are stored in the /data/cat/ subfolder. This is the only place Ryuzine Rack will look for them, but you need to tell it what file(s) to look for under the "Data Catalogs" section. As you'll see there is already a default catalog set by default:
"Catalog 1" is the title of the catalog as it will appear in the "Sort List" panel within Ryuzine Rack. If you only have one catalog, though, it doesn't show the name of it. But if you use the "Add" button to define a second catalog then the name you enter in the "Text" field will be used.
"catalog1.htm" is the filename of the catalog file stored in /data/cat/. You can name the file anything you like and you can have different catalogs for all sorts of reasons. For example you might have a different catalog for each year of your publication, making it easy for visitors to browse your archive of back issues. Or if you provide your content in multiple languages a catalog in each language. Or one catalog for material on your own website and another for offsite material. How you divide up catalogs is left entirely up to you.
8.3.3 Promotion Animation ( 0 = no animation | value = interval in seconds) - this is the animation interval for the promotion carousel at the top of the first page in Ryuzine Rack. You need at least FIVE promotions set up before the carousel will actually start animating.
8.3.4 Maximum Number of Promotions - select a value from the drop-down list. Obviously it is counter-productive to tag too many items for promotion, you will want to highlight your latest and/or best material. Ryuzine Rack always tags the newest item in the catalog for promotion (and builds a promotion automatically if necessary).
8.3.5 Items per Page - default is 10 items but you can set it to show more or less. Setting the value too high will make the webapp take longer to load. End users can set their own preference in the Options panel.
8.3.6 Media Types - you can also define the Media Types and what text appears on the buttons below each of those types of items in Ryuzine Rack. This is the same list used by the Rack Builder Utility, so if you create/edit them in one place they are automatically updated in the other utility.
8.4 Ads Tab

Ryuzine Reader and Rack have integrated advertising options. If you are not using advertising, or prefer to place your ads in the pages, you can ignore this section. You can, of course, always simply place advertising within the pages of your publication, but the Integrated Advertising allows you to place advertisements as part of the web app instead of your publication.
8.4.1 Splash Screen - this is the first thing any reader sees. Normally it only displays long enough for all stylesheets and add-ons to load. Setting a time value here will force the Splash Screen to display for the specified number of seconds before taking readers into your publication.
8.4.2 Box Ad - places an advertisement in a Dialog Box (default) or a Lighbox (if the "lightbox" or "ryulightbox" add-ons are being used). This pops up overlaid on top of your publication and will automatically close after the specified number of seconds.
8.4.3 Banner Ad - mobile-style banner ad which shows/hides on whatever interval you choose.
Setting these to zero disables them. Entering an "x" will make the ad persistent (will display until the reader manually closes it). Any numerical value entered will be the number of seconds to display the ad (the reader always has the option to close it sooner, however). For banner ads the value also defines the amount of time that passes (in seconds) before the banner is displayed again.
9. Add-Ons Panel
 Add-Ons that create their own custom workspaces are now shown in the Add-Ons Panel within Ryuzine Writer.
To open the Add-Ons Panel find the button that says "Add-Ons" under it and/or has a puzzle piece icon. The Add-Ons Panel will slide into view:

Each Add-On that created a custom workspace will have a button in this panel. Click on the button to open the workspace. Let's take a look at the "ePub Export" Add-On workspace:

The panel will close and the custom workspace will slide into view:

You'll notice that with the "writer" theme applied to Ryuzine Writer the puzzle piece icon expands into a tab that says "Add-Ons" and just below that it displays the name of the add-on's workspace (in this cases it is "ePub Export"). Other themes may display these things differently.
Note: the "ePub" add-on allows you to convert your Ryuzine publications to ".epub" format for use in e-readers and eBook applications. The conversion process is not perfect and ePub format does not support many of the web features that work in Ryuzine format.
10. Options Panel

10.1 Help Button - the [?] icon in the Options Panel titlebar will opens the Guide Tour help (see below).
10.2 Auto-Import Master Styles - whatever stylesheet is set in the writer config under "importStyles" will automatically be loaded into the Master Styles Panel when this is switched on. Changes to this setting take effect after reloading Ryuzine Write in your browser.
10.3 Rich Text Editor - if you prefer to work without a net and "hand code" your publications you can entirely turn off the Rich Text editor (this would also allow you to run Ryuzine Writers in "barebones" mode, which doesn't even require running it from a web server).
10.4 Native Scrolling - this switch only appears on compatible touch screen devices and allows you to switch between the javascript touch scrolling and the device's built-in method. It usually only works if Zoom & Pan is enabled as well.
10.5 Zoom & Pan - changes the way Ryuzine Writer works inside the browser of a compatible touch device. Turning this on should allow you to spread/pinch zoom in/out on the interface and turning this on may be required to make Native Scrolling work.
10.6 Show All Dialogs - some Dialogs have a checkbox allowing you to selectively not show them again. This switch over-rides that checkbox and shows all dialog boxes regardless of whether they were previously hidden or not. The primary use of this is to uncheck the box on a dialog if you hid it by accident and wish it to be shown again.
10.7 Normal Tab Key - you'll probably notice that in the Ryuzine Writer forms you cannot move from one entry box to another using the Tab key. This is on purpose because there is nothing to prevent you from tabbing into a form in a hidden Workspace (which also breaks the user interface and requires it be reset). So, by default the normal tab order is suppressed. If you want or need it to restored (and understand it can mess up the user interface if you tab out of a visible area) you can turn normal tab key operation back on.
10.8 Theme UI (not shown)- if Ryuzine Writer has a theme applied to it you can disable it here and use the default (Dark) theme.
10.9 Guided Tour - opens the Bubble Guide Help feature which interactively walks you through the features and functionality of Ryuzine Writer.
10.10 About Ryuzine - opens a Dialog with web app version and license data, as well as a list of the currently loaded and active add-ons.
10.11 Add-On Settings - if an add-on has its own custom settings and did not create its own settings panel the buttons, switches, or drop-down menus will most likely appear in the lower section of the main Options Panel. In some cases, for example the "Theme UI" drop-down, it over-rides and hides the default control switch because it is replacing the default functionality (a simple on/off switch) with a list of options.
11. Appendices
This section contains additional, detailed, and specialty information which may not be of interest to general users of Ryuzine Writer but are included here for completeness and for advanced users.
11.1 About Styles
11.1.1 Styles in Ryuzine Writer
Despite vast improvements over the beta releases, working with styles in Ryuzine Writer is still, admittedly, rather difficult. It is strongly recommended that you work with external stylesheets and edit them in a separate text/code editor, and disable or clear the browser cache before running "Build" or "Preview" updates in the Simulator. This workflow, though, obviously requires you to be familiar with hand-coding CSS.
11.1.2 Terminology
Issue - Think of an "issue" in terms of a periodical released with a specific set of contents, for example, on a monthly, quarterly, or annual basis.
Edition - an "edition" is a specific version of an issue. For example, some publications are released in more than one language or with different covers but have the same issue number and content. If there is only one version, though, the "issue" and "edition" may be one in the same.
Master Styles - the classes placed in a master stylesheet would be layout template styles that would apply to however many different versions of the issue there are. For backwards-compatibility with older publications, master stylesheets are always linked as "Issue Styles."
Edition Styles - would be styles that apply exclusively to a specific version of an issue. If you are loading them from a stylesheet these are linked as a "Custom External Stylesheet." If you only have one version of your publication you may not be using Edition Styles at all.
Remember that these are "cascading style sheets" so any styles declared in a Master stylesheet can be over-ridden by an Edition stylesheet, and both can be over-ridden by In-Page styles (see below).
NOTE: The default "thisissue.css" file is normally loaded in both the Editor and by the Ryuzine webapp. This file is intended to be duplicated and used as a template for your own, custom, issue/edition-specific external stylesheets. You should not be editing the "thisissue.css" file itself. If you want the Editor to load one of your custom Master stylesheets instead you can specify the filename for "importStyles" in the "writer.config.js" file located in the ~/ryuzinewriter/js/ path. This will be over-ridden, though, if the file you open in the editor already links to a Master/Issue stylesheet.
11.1.3 Writer's Style Panels
It is important to note that both of the style panels are limited in what they can import. The following cannot be imported into the panel lists:
- Nested rules
- Rules inside of @media query blocks
- Compound Selectors (only imports the first selector from each)
- Rules applied to objects by unique ID
It is important to note this only affects what rules appear in the style panels. Everything in the external stylesheet will still be used when it is loaded by the Ryuzine webapp.
Master Styles Panel - this panel only allows you to import an external stylesheet and apply or remove styles by clicking on the classes in the panel's list. Whatever stylesheet you load with this panel will also appear in the "Issue Styles" of the Output Format dialog and (if it is not the default "thisissue.css" stylesheet) automatically will set the format option radio button to "custom."
Edition Styles Panel - this panel allows you to import an external stylesheet too, create in-page styles from scratch using the "Add Style" dialog, and/or add to or delete styles from an imported stylesheet.
If the document you opened in the Editor already had in-page styles, though, importing an external stylesheet will replace the document's in-page styles.
If the document you opened in the Editor already had in-page styles they will not be imported into the Edition Styles panel. Any new styles you create will be appended to the existing rules, but you will not be able to use the panel to delete them.
Known Issue: If a document you opened in the Editor already has in-page styles and you switch to "text" view and you select the "Clean Up HTML" button without having selected any code in the page it will delete any <style> blocks it finds! If you created custom styles with the Edition Styles panel they will still show up in the panel, but the rules they refer to will be gone.
11.1.4 In-Page Styles
You will notice that the Output Format options has a check-box for "Preserve In-Page Styles" and the "Issue Styles" has a radio button option for "CSS Export Box" so here is how those options work:
Preserve In-Page Styles - if the document in the Editor has any <style> blocks in it with rules, this is how you preserve them, otherwise they will be ignored on "Build." To preserve them hit the "Format" button to open the Output Format dialog and check the "Preserve In-Page Styles" checkbox, "Submit" it, and then try "Build" again. If you got to Export > HTML you should see a <style> block in the code with your styles inside.
CSS Export Box - in the Output Format dialog the last radio button for "Issue Styles" gives you the option to use the code from the text area box in the Export workspace under the "CSS" tab. It will automatically generate the (empty) Master/Issue stylesheet rules and write them into both the processed code under Export > HTML and in the box under Export > CSS. Furthermore, you can manually edit the code in the box under the CSS tab, go back to "Editor" and "Build" and it will incorporate your style edits. This is a handy way to build a Master/Issue stylesheet and test it without having to use an external code or text editor, but it is also unforgiving if you make mistakes (there is no code coloring, hinting, undo, or autosave - you are on your own if you choose to work inside this text area box).
If you have in-page styles, and have checked the "Preserve In-Page Styles," but "Issue Styles" is not set to "CSS Export Box" then the preserved styles will also be written into the CSS Export Box as well. So, keep in mind that either your preserved styles can be in the CSS Export Box or your Master/Issue styles for testing will be in it, but not both. Both, however, are written into the processed code under the Export HTML tab (but any edits you make in the box will only be picked up by the Simulator if you hit the "Preview" button, and will disappear as soon as you hit "Build" again in the Editor. If you want your in-page style edits to stick, switch the Editor from WYSIWYG mode to Text mode and make your edits there).
If you created Edition Styles from scratch, without importing an external file, your custom styles are simply written into a <style> block within the Editor document. The Edition Styles panel always creates a <style> block because even if you just imported an external stylesheet it also allows you to add and delete items (note: if you delete items from an imported external stylesheet you will want to UNCHECK the "Custom External Stylesheet" box to prevent the external stylesheet that still includes the rules you deleted).
You will see your custom styles take effect right inside the WYSIWYG editor, but if you hit "Build" you will notice they probably did not carry over to the Simulator preview of your publication. If you look at the built code in Export > HTML you will see there is a <style> block with the default rules in it, but your custom styles will be missing. That is where that checkbox comes into play!
"CSS Export Box" code is not written into the Editor document, the only way you can see the affect of your style rules is in the Simulator.
Ryuzine Writer does not assume that, just because it found <style> blocks in your document that you intend to use them in your final publication. It also ignores any such blocks it might find in the <head> tag of a document you opened in the Editor. Retaining in-page style blocks is not really recommended since they would still be applied even when readers select one of the alternative views. External stylesheets are recommended because the Ryuzine script can remove and restore them in order to change the view to suit reader preferences.
Technical Note: Ryuzine Writer will preserve links to external Master and Edition stylesheets on files you open in the Editor, but it will discard any <style> blocks it finds in the <head> block, so "in-page styles" is quite literal - to be imported into the Editor they need to be in the <body> of the document (this is fine to do with "wip_" files, but is strongly discouraged in finished publications). Within the code-view of the editor there is no way to edit anything in the <head> of the opened document anyway, and what is there is used exclusively by internal functions.
11.1.5 Simple Styles
If you aren't very familiar with creating custom classes or just want convenient shorthand methods there is the "simplestyles" add-on. You can use it for an additional stylesheet in the Output Format dialog or you could load simplestyles.css as your Master Styles.
Then you can use any of the following classes on your page elements:
| Aligning Block Elements | Aligning Text Elements |
| .left | .-left |
| .right | .-right |
| .center | .-center |
| .clear* | .-justify |
| *After you align objects you should include an empty element with class="clear" applied to it to reset the flow of the page. If you don't then objects that follow may not be aligned as you expect and longer/taller objects can "spill out" of the bottom of a page. | |
| Font Sizes | |
| Sample | .xx-small |
| Sample | .x-small |
| Sample | .small |
| Sample | .medium |
| Sample | .large |
| Sample | .x-large |
| Sample | .xx-large |
In page layout there are a lot of standard names for various font weights, not all of which are used in CSS. These styles try to equate the standard names to the best corresponding web style with preset fallbacks for older browsers.
| Font Weights | ||||
| Tags/Classes | ||||
| sample | .ultra-light | .extra-light | ||
| sample | .light | .thin | ||
| sample | .book | .lighter | ||
| sample | .regular | .normal | ||
| sample | .medium | |||
| sample | .semibold | .demibold | ||
| sample | <strong>* | .bold | ||
| sample | .heavy | .black | .bolder | |
| sample | .ultra-black | .extra-black | .fat | .poster |
| * Equates the <strong> HTML tag to CSS .bold (font-weight: bold | font-weight:700). | ||||
| Font Styles | ||||
| Sample | <em>* | .italic | ||
| Sample | .oblique | |||
| Sample | .normal | |||
| Sample | <s>* | <strike>* | .del | .strike |
| Sample | <u>* | .underline | ||
| Sample | .overline | |||
| Sample | <pre>* | <code> | .code | |
| Samplesup | <sup> | .sup | Note: superscript | |
| Samplesub | <sub> | .sub | Note: subscript | |
| * These are HTML tags that are equated to CSS styles. You should use CSS for these, but if you have imported code from another program that is still using the tags the appearance will be standardized between CSS and HTML. | ||||
Simple Colors
|
Background Colors |
Text Colors |
|
.bg-black |
.black |
|
.bg-red |
.red |
|
.bg-orange |
.orange |
|
.bg-yellow |
.yellow |
|
.bg-green |
.green |
|
.bg-blue |
.blue |
|
.bg-gray |
.gray |
|
.bg-white |
.white |
There are many more colors which can be referred to by names, but you will have to create custom styles for those in your "thisissue.css" file. For all other colors you should refer to them by their hexidecimal or rgb values.
11.2 Webcomics
Ryuzine is a great format for publishing webcomics that have the look and feel of actual, physical comics. This version of Ryuzine Writer makes it easier than ever to quickly assemble Ryuzine editions of your web comics with minimal work.
STEP 1. Scan your comic book pages and place the images in a single folder. Make sure the filename format is consistent and that the files are numbered consecutively from zero, including front, inside front, inside back, and back covers.
STEP 2. Put the folder full of scans into the /images folder of your Ryuzine development server installation:
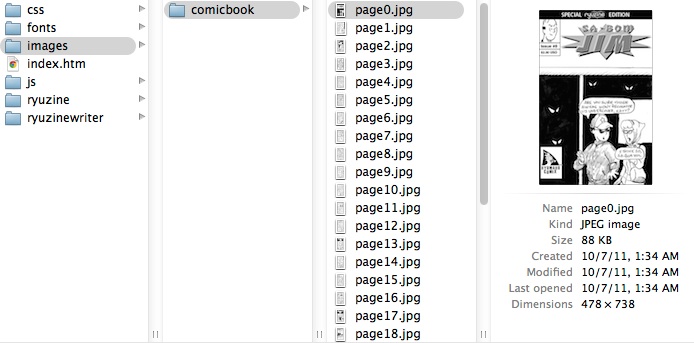
STEP 3. Open the Template Wizard either from the Start Screen or the Editor "File" menu, and tick the "Show Webcomics Options" box, which will reveal additional template options:

A) 11.2.1 Image Folder - enter the name of the folder you put in the /images folder in Step 2.
B) 11.2.2 File Name is where you tell the Template Wizard how to find your scanned images.
Prefix - if the file names for the scanned images have a consistent sequence ahead of the count enter it in this box, otherwise leave it blank.
Count - using the drop-down list select the numbering format for your image scans. They are typically either just the number or have varying numbers of leading zeroes ahead of the count.
Suffix - if there is a consistent sequence of characters after the count number in all the file names enter it here, otherwise leave it blank.
Type - select the image file type. You'll notice the image types are presented in both uppercase and lowercase. Some servers are "case sensitive" so, to avoid missing and broken image errors, make sure to select the correct case.
C) 11.2.3 Manga Binding - switches to the "manga.config.js" file which is preset to use the right-hand binding option, for a more authentic "manga" reading order.
D) 11.2.4 Add Comic Book Styles - inserts pre-defined styles that make Ryuzine more like a comic book. If you check this box it also automatically selects the "Preserve In-Page Styles" on the Output Options panel:
Fit Image By Both Width & Height - this creates an in-page stylesheet that sets each page scan as a background image scaled to fit by both width and height. It ensures that your images will always fit on the page without scrollbars, but you may end up with rather wide margins to the left and the right of the image. Rather than shrink the image too small in landscape phone view it switches back to the embedded, scrolling version.
Fit Front and Back Covers to Page Size - makes sure the front and back cover images will fit within the size of the page without scrolling.
E) 11.2.5 BUILD COMIC ON SUBMIT - if you check this box some of the options below it will be automatically disabled, and after you press the "Submit" button your comic book will be built automatically and you'll be taken to the "Export" screen. You'll still need to build a Package manually, however.


STEP 4. Fill in any additional Template Wizard items as you need and Submit the form. If you configured things correctly the Editor window should be showing preview images of your page scans, divided into page_box elements.
STEP 5. If you did NOT select "Build Comic On Submit" you'll need to build your publication manually. Press the "Build" button at the top of the Editor workspace. You will be taken to the Export workspace and, if you chose "Add Comic Book Styles," should see a Notice that those styles should be moved to the issue-specific stylesheet before publication (though this is not strictly necessary):
You will see the resulting Ryuzine publication code in the HTML Export window:
STEP 6 (optional). If you want to preview what your comic book will look like on various devices go to the Simulator workspace.
STEP 7. When you're satisfied with your comic it is time to save the Ryuzine file! How you do this will vary depending on your development environment and whether you just want to save the HTML file or if you want to "package" your publication (packaging is only available if you have PHP File Operations available).
Javascript Save - if you do not see a "Save" button at the top of the Export workspace there are no file operations available. Javascript has no direct method for saving the code generated by Ryuzine Writer (this Javascript limitation is a security feature). What you need to do is select the HTML Export window (where all the Ryuzine code is written), select all (CTRL+A or CMD+A), copy to the clipboard (CTRL+C or CMD+C). You now need to open a plain text editor. On Windows this can be Notepad, on Mac OS X it could be Text Editor, paste the contents of the clipboard into the blank document (CTRL+V or CMD+V) and then "Save As" the document under whatever filename you want. Ideally save it into the top level of your Ryuzine installation on your developement server (if you are working on the same machine as the installation) otherwise you'll need to FTP the file into that folder.
PHP File Save - if there is a "Save" button at the top of the Export workspace you can select "Save HTML" if you just want to save the file you've created. A dialog will pop up asking what name to give the file. You can also choose "Build Package" from the menu, in which case the file will be saved but it will be bundled with all the page scans, configuration files, and stylesheets and delivered as a ZIP file. The options available are discussed in greater detail in the "Build Package" section of this manual.
STEP 8. Distributing your Comic! If you "packaged" your comic you'll have a tidy ZIP file which either automatically downloaded to your computer or a download link was presented. You can send this ZIP file to other people and/or offer it as a download on your website and they can unzip and read it offline in their web browser. If you prefer to "host" your comic on your own web space you'll need to unzip the file yourself and FTP all the files to your website and then publicize the link to the HTML page.
If you had to use the "Javascript Save" method you'll need to manually gather up all the files related to your comic and either package them into a folder and compress them into an archive or FTP upload them to your web space.
Comic book images from "Sa-Bom Jim" copyright Jon D. Sloan. See more of his work at www.sa-bomjimcomic.com.
11.3 Dynamic Images
Ryuzine automatically adjusts to the screen size of the device on which it is viewed. That means you need to decide how people will see your images. There are really two different options:
- Use one set of images for everyone and simply scale them up or down accordingly.
- Use multiple sets of images with each set scaled for each view.
Option 1 has the advantage of simplicity since Ryuzine will automatically scale images embedded in the pages to fit if they are too large.
 The disadvantages of this method are if the images are low resolution they won't look very good on high-density displays and if you use higher quality images you may be delivering unneccessarily large image files to mobile devices.
This cat picture thumbnail image would be suitable for standard density displays, but would appear blurry on a high-density display.
 This second version of the cat image should look good on both standard and high density displays, because it is actually twice the size of the first one and scaled to the same dimensions. While it's not an issue to do this for a couple small images, if you have many large images in your publication you'd be delivering many unnecessarily large files to standard density devices. If that's the case, then you'd be better off using Ryuzine's "Dynamic Image" feature and CSS to selectively swap out those images with higher resolution versions only for the high density displays.
Option 2 is a bit more work but you can tailor the images to each screen size and even target devices with higher pixel density (such as Apple's "Retina" display) with images that will take advantage of the higher quality screen. It isn't as many images as you may think, however. The images used in the two-page spreads are also used for the single-page portrait views.
To use this option insert a dynamic image with the Ryuzine Elements Panel > Dynamic Image or Dynamic Thumbnail. You can either select an existing image, which will be wrapped in the dynamic coding or you can insert the dynamic block first and then place an image inside of it. The image inside the box is the default/fallback image. The block location is shown in the editor with a dotted red outline. In the final publication it will be made invisible (to preserve the spacing) and what the viewer actually sees will be determined by CSS targeting the dynamic image's unique ID.
This cat picture thumbnail image would be suitable for standard resolution devices, but would appear blurry on a high-density display.
The easiest way to make sure users on high-density displays see a clearer image is to swap this cat picture out with a higher resolution one. If the pixel density of the display is 2.0 then you would need to seen that display a version of this image that has at least 2x the number of pixels.
The easiest way in Ryuzine to do this is to use the "Dynamic Image" block in the Ryuzine Elements Panel of the Editor. Here is the same image wrapped in a "Dynamic Thumbnail" block:
This version has a unique ID of "kittycat" (the Dynamic Thumb option from the Ryuzine Elements automatically appends "-thumb" to the ID) and a general class of "dyn_thumb" that allows you to hide the lower resolution (embedded) image, keeping the space it takes up, but place a higher-resolution image as the background of the element. So in your stylesheet you could do this in the high-density display section:
@media only screen and (-webkit-min-device-pixel-ratio : 2.0),
only screen and (min--moz-device-pixel-ration: 2),
only screen and (-o-min-device-pixel-ratio: 2/1),
only screen and (min-device-pixel-ratio: 2) {

    .dyn_thumb img { visibility: hidden; }

    #kittycat-thumb {
        background-image: url('images/manual1x/kitten_hires.jpg');
        background-position: top center no-repeat;
        -webkit-background-size: 100% auto;
        -moz-background-size: 100% auto;
        -ms-background-size: 100% auto;
        background-size: 100% auto;
    }
}
If you view this page on a high-density display the top image of the kitten will be blurry, but the lower one will be sharp. On a low-density display the images will look identical.
What the CSS code above does is, first it hides the embedded image inside all "dyn_thumb" containers. They become invisible, but the space they take up and position on the page are retained. The second part targets a specific container by it's unique ID and places a high-resolution version of the image as the "dyn_thumb" background, scaling it to fit within the container (so it is scaled to the same size as the invisible embedded image). Standard density displays will see the lower resolution embedded version, high density displays will show the high resolution version.
Note, however, that high density displays would be loading TWO images, the (invisible) embedded image AND the high resolution background image. To prevent loading two images you could give the "dyn_thumb" (or "dyn_image") container the specific dimensions you want and use CSS to swap out either the low resolution or high resolution image as the background of the container. The downside of doing this is that, without a stylesheet applied in the Editor, you'll just see empty boxes with a dotted red outline wherever one of these images is placed. But within the Ryuzine Reader web app people will only be loading the image appropriate for their device's display density.
The "Dynamic Thumbnail" and "Dynamic Image" blocks work in exactly the same way. The reason for two different classes is so that you can style thumbnails and non-thumbnail images differently. The HTML code they produce looks like this:
Dynamic Thumbnail
<div id="dyn_example-thumb" class="dyn_thumb"> </div>
Dynamic Image
<div id="dyn_example-image" class="dyn_img"> </div>
CSS Code Snippets
1. Embedded images, all thumbnails 75 pixels wide with automatic height:
        .dyn_thumb { display: table; width: 75px; }

        .dyn_thumb img { width: 100%; height: auto;}
2. No embedded image, all thumbnails 75 pixels wide with maximum 100 pixel height, auto-fit images with no cropping:
        .dyn_thumb {
                display: block; /* could also be inline-block */
                width: 75px;
                height: 100px;
                -webkit-background-size: contain;
                -moz-background-size: contain;
                -ms-background-size: contain;
                background-size: contain;
        }
Then each thumbnail would have to be targeted by unique ID with a background-image styling, with standard density getting the low-res image and high-density getting the high-res image.
3. No embedded images, all thumbnails 75 x 100 pixels, auto-fit images with cropping if necessary:
        .dyn_thumb {
                display: block; /* could also be inline-block */
                width: 75px;
                height: 100px;
                -webkit-background-size: cover;
                -moz-background-size: cover;
                -ms-background-size: cover;
                background-size: cover;
        }
Then each thumbnail would have to be targeted by unique ID with a background-image styling, with standard density getting the low-res image and high-density getting the high-res image.
Also keep in mind that if you padded the dynamic container the background image you place will scale based on the full size of the container, including the padding, so if your intention was to create space around the image it would be better to set a margin instead of padding for dynamic images.
11.4 Advanced Layout
You can also use professional page layout software to help build your Ryuzine publication. This is particularly useful if you are adapting a print media publication or plan to also distribute your publication as a PDF or in print.
InDesign: Export to Dreamweaver
If you are more familiar with using Adobe InDesign for page layout you can also use that as a starting point, and it is quite useful for building scaled and optimized images for the varous Ryuzine display sizes. You really only need to create the high-density iPad portrait version and scale it down to the other sizes. Set your Units to "points" which for all practical purposes are equal to "pixels." Refer to the layout sizes and diagrams above when setting up your InDesign document.
Remember that you are outputting to web for this, not print. Any images you have used in your layout should be at 72 dpi (screen resolution). If the images are print resolution the "Export to Dreamweaver" image export options will create badly pixelated images. If that happens you should open the image(s) in question in Photoshop (or GIMP) and change the resolution to 72 dpi while maintaining the same pixel dimensions as the original image.
InDesign is not intended for web page layout so you'll have to make some compromises:
- Headers must be a text box on each page and not part of your Master Pages
- All the Live Area content of a page must be in one group
- You cannot have any nested groups of objects
- You cannot define lightbox links
- You need to tag the elements with Object Styles (the styles themselves can be empty by unchecking all the Attributes)
- You cannot define lightbox links or a custom social networking (you have to do that with Ryuzine Writer)
- You need to have a header for each page (even if you leave it empty the text box object must be present and tagged with the "section-head" Object Style)
- If you do not include a text box tagged with "splash-title" the file name for the document will be used.
Object Style names for Ryuzine: splash-title, splash-screen, welcome-sign, section-head, light-boxed, appbanner, exit-sign
The grouped objects that define the content for each page will automatically be tagged with the class "group" which Ryuzine Writer understands as the equivalent to its "page_box" element. Technically you can place the other elements inside the page content, but be aware they'll show up twice in the final processed Ryuzine publication.
When you've got it all assembled in InDesign go to File > Export for Dreamweaver. Then, pick a name and place to save your HTML file, after which the "XHTML Export Options" dialog pops up:

On the "General" section make sure to select Export > Document.
On the "Images" section tell it you want the images copied, "Optimized" and "Formatted" (this will make sure they are cropped however you may have done so in your layouts). Use Image Conversion > JPEG, ignore the GIF Options section, and under JPEG Options set the Image Quality to either "High" or "Maximum" and the Format Method to "Progressive."
On the "Advanced" section choose either "Empty CSS Declarations" or, if you set text and color styles you want to preserve choose "External CSS" instead. Do not select "No CSS" or importing the file to Ryuzine Writer won't work.
Click the "Export" button and wait while it converts your document to XHTML. When it is done you should have a file ending in .html and folder full of your images already scaled and cropped and converted to JPEG files (if they weren't already).
Now you need to put the images folder into your Ryuzine development environment inside the Ryuzine "images" folder. Next, fire up Ryuzine Writer in your web browser and use either the "Open Source File" shortcut on the Start Screen or go to File > Open File in the Editor workspace. When you open the file Ryuzine Writer will detect that it is an InDesign Export to Dreamweaver file and attempt to convert it into Ryuzine format. When it is done the converted file should appear in the Editor window, however the image links in it will be broken. You need to go to each image and change the path to point into your Ryuzine "images" folder first and THEN to the image folder InDesign exported and you copied or moved. Make sure to save the converted file from the Editor (so you don't have to re-convert it every time you open it).
From this point onward it will be like working with any other source file in the Ryuzine Writer editor.
InDesign: Export XML
If you want to define/preserve how your document is organized you can use InDesign "Tags" to define the document structure and then the "Export XML" option in the Structure sidebar. The "Object Styles" you set up for Export to Dreamweaver are ignored by Export XML. So this is a little more complicated, but in the end you have a file that can be imported to Ryuzine Writer which doesn't need to be converted like the Export to Dreamweaver files do.
Now you'll want to open that sidebar via View > Structure > Show Structure. Initially it should only have one element in it that says "Root."
InDesign is for print layouts and uses XML tags instead of HTML tags. However HTML is actually a sub-set of XML so we can "create" XML tags that are the same as HTML tags. To do this we need to open the "Tags" panel: Window > Tags and the panel should open. Just like the "Structure" sidebar this should only have one thing in it that is named "Root."
Create HTML Tags: You can either use the Tags Panel > Flyout Menu > New Tag and define each HTML tag you'll need (html, h1, h2, h2, h4, div, p, em, strong, span, ol, ul, li, table, td, img) and then make sure you do Tags Panel > Flyout Menu > Save Tags (so you don't have to do this every time), then you can just import them from a file with Tags Panel > Flyout Menu > Load Tags to reload the file.
Or you can just right/hold+click and "Save As" our sample "html_tags.xml" file and load that into the InDesign Tags panel. ;-)
Apply HTML Tags: In the Structure sidebar start by right/hold+clicking on the "Root" tag and go to "Tag Element" and from the list set it to "html" (it should now say "html" where it said "Root" before). Now you need to select each element of your publication and tell InDesign what the corresponding HTML tag is for that element. This is actually pretty easy! Select the element, right/hold+click on it, in the context menu go down to "Tag Frame" or "Tag Text" and then select the HTML tag from the list as follows:
- "section_head" text frame > Tag Frame > h1
- "welcome_sign" text frame > Tag Frame > div
- "exit_sign" text frame > Tag Frame > div
- image > Tag Frame > img
- In your page content you need to select the text for each paragraph one at a time, right/hold+click > Tag Text > p (if you don't it will be exported with no paragraph formatting!)
- If any text in your pages is styled (bold, italic, etc) you need to select each styled bit of text, right/hold+click > Tag Text > strong (if bold) / em (if italic)/ span (if some other styling will be applied).
- If you are using a "splash_screen" advertisement it's a bit more complicated. Right/Hold+click on the image frame > Tag Frame > img as normal, then in the Structure Sidebar you need to right/hold+click on the corresponding "img" tag in the panel and select New Parent Element > div from the context menu. You need to do the same thing if you included an "appbanner" banner ad element.
You can save yourself a little work, though, if you go to either the flyout menu for the Tags panel or the Structure sidebar and select "Tagging Preset Options" then you'll see:
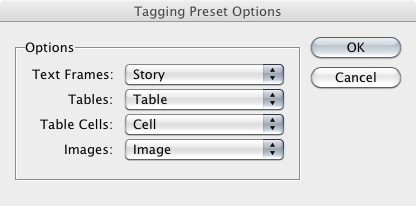
Change it to:
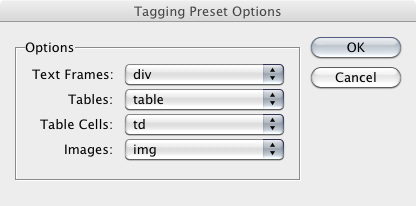
Structure Tags: In the Structure Sidebar use SHIFT or CMD/CTRL select all the elements in the body of a page (do not include the header). With them still selected right/hold+click on one and in the context menu select New Parent Element > div. It should now show all those selected items as sub-items of a "div" tag in the Structure tree. Repeat for each page and, if necessary, drag the order of section header "h1" and page "div" tags so they are in the correct order.
Style Tags: Up to this point you've only added generic HTML tags. Ryuzine Writer needs to know what tags represent elements of a Ryuzine publication. To do this we need to style the tags! Select a tag in the Structure sidebar then either:
- press the circle in the top of the sidebar, which will open the New Attribute panel OR
- right/hold+click and select "New Attribute" from the context menu.
In the New Attribute panel you need to set the CSS style for that element. The "Name" will either be "id" or "class" and the "value" will be the element ID or class name as follows:
h1 > Name: class > Value: section_head
page div > Name: class > Value: page_box
welcome div > Name: id (or class) > Value: welcome_sign
exit div > Name: id (or class) > Value: exit_sign
banner ad div > Name: id (or class) > Value: appbanner
splash ad div > Name: id (or class) > Value: splash_screen
text tagged with span > Name: class > Value: (whatever the name of the class is)
or for "inline" styles:
tex tagged with span > Name: style > Value: (css styles to apply to the element)
Export Document: In order to export your document you need to open the Structure Sidebar > Flyout Menu > Export XML which will then prompt you for the filename and save location. You can choose to add the filename extension ".htm" or ".html" now or change it later on. It's actually an XML file, but if you are using Ryuzine Writer's PHP File Operations it only looks for HTML pages, not XML so you need to "trick" it by changing the apparent file type. After that the Export XML dialog window pops up, change the setting to the following:
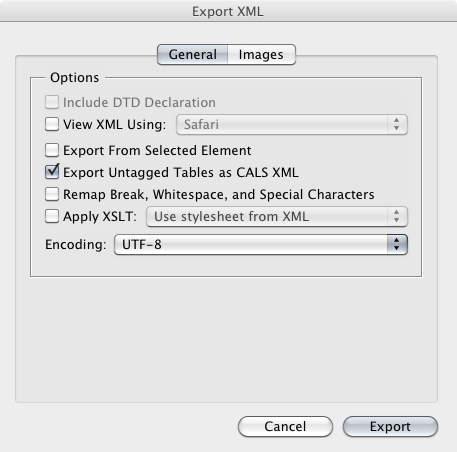

Now you can import your XML file (renamed with a .htm or .html at the end). Ryuzine Writer will detect that it is an InDesign file and automatically fix the image file references. When InDesign exports the XML the image elements are in the following format:
<img href_fmt="images/myimage1_fmt.jpeg" href="file://path/to/original/file/myimage1.tiff" />
That won't work for a web page so Ryuzine Writer automatically looks for it on import and rewrites it on the fly to normal HTML href and removes the href_fmt. However this still won't make the images show up in the editor. InDesign will have created an "images" folder full of the pre-formated, optimized images. Copy or move that folder to your Ryuzine /images folder. Rename the folder to something that makes sense (like the name of the publication). Now, in Ryuzine Writer go into HTML/Code Editing mode and find each <img> tag. For the "href" on each you'll need to point it into that renamed folder something like:
<img href="images/renamedfolder/myimage1_fmt.jpeg" />
Make sure you save the file from the Ryuzine Writer Editor workspace. From this point on it is like working with any other Ryuzine source file.
Scribus: Export
(Note: this requires OpenOffice, Libre Office, or NeoOffice and an image editor such as GIMP)You can also do your initial page layout in Scribus using the same document settings as noted for InDesign. However, Scribus has no native method to export to HTML so it's a bit more complicated. You need to Export>PDF and change the image resolution setting to "72 dpi" in the dialog, then open the PDF in OpenOffice (with the PDF plugin) or NeoOffice (on Mac) and Export it as HTML or XHTML. Tell it to export the images for a "high resolution" monitor. Unfortunately it will treat the pictures as background images composited onto a background equal to the size of the page. If you want to then crop them out of that background use GIMP, Photoshop, or Fireworks to do so. This is a rather clumsy workflow and is therefore not recommended, but is possible.
11.5 Layout Guides
Ryuzine adapts to various screen sizes so there are several different page layout sizes. This may seem a little intimidating at first, but you really only need to design for the largest, single page size and then scale things down for the smaller layout sizes. The images on this page are to scale in relation to one another and the full-size versions are available in a downloadable ZIP file (262 KB) for use as layout templates.
The "Live Area" of each page is like a miniature web browser window itself and can be of infinite length. If you add content that doesn't fit vertically it will simply add a scrollbar. There is an allowance for the scrollbar already coded into Ryuzine and any images too wide to fit the "Live Area" at any given screen size are automatically scaled down to fit. The "Live Area" of the two-page spreads is slightly wider than the portrait view because the inside margin is half the width, however it's best to design for the narrower space of the portrait view.
If you are using Advance Layout techniques with other page layout software these templates are provided to help you set up the layout parameters in your editing program. These layouts only represent the maximum height of the pages when Ryuzine is not using "HTML" view (which is a "fluid" layout that ignores layout stylesheets) or "Continuous" view (which honors the layout's width, but expands the height of the page(s) to fit their content.
11.5.1 Square Page
The square page layout is most similar to a standard magazine aspect ratio. It should be suitable for adapting magazine-like layouts to Ryuzine format.
11.5.1.1 Xlarge
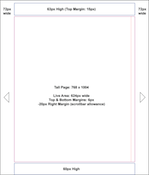
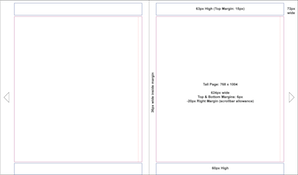
- Portrait Page: 768 x 902 px
- Margin Left: 72 px
- Margin Right: 72 px
- Header: 63 px high + 15 px top margin
- Live Area: 624px wide + 6px top and bottom margin
- Footer: 60 px high
- Spreads Inner Margin: 36px
- Spreads Outer Margin: 72px
11.5.1.2 Large
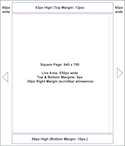
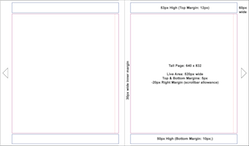
- Portrait Page: 640 x 750 px
- Margin Left: 60 px
- Margin Right: 60 px
- Header: 53 px high + 12 px top margin
- Live Area: 520 px wide + 5px top and bottom margin
- Footer: 50 px high + 10 px bottom margin
- Spreads Inner Margin: 30px
- Spreads Outer Margin: 60px
11.5.1.3 Medium

- Single Page: 512 x 655 px
- Margin Left: 48 px
- Margin Right: 48 px
- Header: 44 px high + 10 px top margin
- Live Area: 440px wide + 4px top and bottom margin
- Footer: 44 px high
- Spreads Inner Margin: 24px
- Spreads Outer Margin: 48px
Note: There is no corresponding portrait view for this size.
11.5.2 Tall Page
The tall page layout is inspired by the aspect ratio of comic books or digest format trade paperbacks. It is best suited for use with webcomics or any layout that looks better in a more rectangular aspect ratio.
11.5.2.1 Xlarge
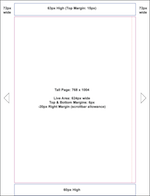
- Portrait Page: 768 x 1004 px
- Margin Left: 72 px
- Margin Right: 72 px
- Header: 63 px high + 15 px top margin
- Live Area: 624px wide + 6px top and bottom margin
- Footer: 60 px high
- Spreads Inner Margin: 36px
- Spreads Outer Margin: 72px
11.5.2.2 Large
- Portrait Page: 640 x 832 px
- Margin Left: 60 px
- Margin Right: 60 px
- Header: 53 px high + 12 px top margin
- Live Area: 520 px wide + 5px top and bottom margin
- Footer: 50 px high + 10 px bottom margin
- Spreads Inner Margin: 30px
- Spreads Outer Margin: 60px
11.5.2.3 Medium
- Single Page: 512 x 748 px
- Margin Left: 48 px
- Margin Right: 48 px
- Header: 44 px high + 10 px top margin
- Live Area: 440px wide + 4px top and bottom margin
- Footer: 44 px high
- Spreads Inner Margin: 24px
- Spreads Outer Margin: 48px
Note: There is no corresponding portrait view for this size.
11.5.3 Small
The small layouts are only used on the smallest screen devices (i.e., phones) and are designed to fill the screen in either landscape or portrait orientation.
11.5.3.1 Portrait


- Portrait Page: Variable ( < 480px wide, unlimited height)
- Margin Left: 5 px
- Margin Right: 5 px
- Header: 44 px
- Live Area: Variable ( 310-469px wide)
- Footer: 44 px high
11.5.3.2 Landscape

- Landscape Page: Variable (< 600px wide, unlimited height)*
- Margin Left: 48px
- Margin Right: 48px
- Header: none
- Live Area: Variable ( 384-503 wide)
- Footer: 44px high
* If the browser window is less than < 480px high and < 768px wide as well this overrides the Square and Tall layouts. This accommodates the iPhone 6+ and other large screen phones.
11.5.4 Fill Layouts
There is also a page layout option in Ryuzine that allows the pages to fill all the available space in the browser window (still single pages in portrait and two-page spreads in landscape if > 1023px wide). However, the page margins at the various widths above would be the same.
11.5.5 Layout Scaling
If you want the layouts to have similar spacing in respect to their size it is helpful to know how much you need to scale elements up or down. Here is a table showing the layout scaling in relation to one another:
LAYOUT SCALING |
||
|
SIZE
|
SCALED FROM XLARGE
|
SCALED FROM NEXT LARGEST |
|
xlarge square portrait
|
100%
|
---
|
|
xlarge square spreads
|
100%
|
---
|
|
xlarge tall portrait
|
100%
|
---
|
|
xlarge tall spreads
|
100%
|
---
|
|
large square portrait
|
83%
|
83%
|
|
large square spreads
|
83%
|
83%
|
|
large tall portrait
|
83%
|
83%
|
|
large tall spreads
|
83%
|
83%
|
|
medium square spreads
|
66%
|
80%
|
|
medium tall spreads
|
66%
|
80%
|
|
small portrait
|
40%
|
60%
|
|
small landscape
|
40%
|
60%
|
|
small potrait tall
|
40%
|
60%
|
|
small landscape wide
|
40%
|
60%
|
| Note: "High Density" layouts are scaled up 200% for each layout but browsers typically will count rendered (display independent pixels) rather than actual device pixels, so you only need to worry about providing images at double the standard resolution DPI size scaled to the DIP size. | ||
11.7 Writer Configuration
To change some of the settings used by Ryuzine Writer when it loads you need to edit, in a plain text or code editing application, the configuration file at /ryuzinewriter/js/writer.config.js. That file is commented as to what each line does, but this page offers more detailed information and clarifications. Some of these settings can be changed with the switches on Options Panel without editing the configuration file.
importStyles - if you have "Auto Import Master Styles" turned on in the Options Panel this is where you defined the file that is auto imported. It can be any valid stylesheet in your /css folder. Default value is "thisissue.css"
myStyles - [ 0 = off | 1 = on ] This determines the default setting for the "Auto Import Styles" switch. If you've changed the setting via the Options Panel it sets a cookie which overrides this default setting. Default value is 1.
wysiwyg - [ 0 = no | 1 = yes ] Sets the default for whether the Rich Text Editor is loaded or not. If you changed this setting in the Options Panel it sets a cookie that overrides this default setting. Default value is 1.
zoomable - [ 0 = off | 1 = on] Sets the Zoom & Pan default for Android and iOS 5+ devices. This may need to be turned on to force "native scrolling" to work. The mobile user interface for Ryuzine Writer is experimental, incomplete, and has known usability issues, it is therefore not recommended for use in actual production. Desktop systems without touch interfaces can ignore this setting. Default value is 0.
noobnags - [ 0 = off | 1 = on ] Some dialog boxes have a checkbox that allows you to prevent them from appearing in the future. If you want to change the setting for those dialogs turning this "on" will over-ride the function that hides them, allowing all dialogs to be shown (so you can unstick the boxes on any you previously hid). This is just the default setting, if you have changed it with the switch on the Option Panel it sets a cookie that will over-ride this settings. Default value is 0.
tabindex - [ 0 = off | 1 = on ] Enables/Disables the normal Tab Key operation. It is possible to accidentally tab into a hidden workspace, which shifts the entire user interface rendering it unusable until you force-reload the UI. If you have changed the setting not he Options Panel it sets a cookie that will over-ride this setting. Default value is 0.
filenew - [ 0 | 1 ] Changes the operation of the File > New option in the Editor. A value of "0" replaces the current content of the Editor with an empty document Template. A value of "1" simply clears ALL CODE out of the Editor. Default value is 1.
xfileman - [ 0 = off | 1 = on ] Enable/Disable the PHP File Operations. If you are not running Ryuzine Writer on a server that supports PHP you would need to turn this off, or if you wanted to prevent the PHP scripts from running for some reason. Default is 1.
language - accepts any of the ISO 639-1 two-letter country codes available in the "localize" add-on, which must be loaded as well for this setting to have any effect. Default is "en"
swapThemes - [ 0 = no | 1 = yes ] Enables/Disables targeting different platforms with different themes:
deskTheme - fallback/unspecified Desktop/Laptop OS.
winTheme - Theme for Windows desktops
macTheme - theme for Mac OS X systems.
nixTheme - Theme for Linux systems.
iOSTheme - Theme for iOS devices (iPad, iPhone, iPod Touch)
andTheme - Theme for devices running Android devices
wOSTheme - Theme for webOS devices
bbtTheme - theme for Blackberry Tablet
wp7Theme - theme for Windows Phone 7.x devices
w8mTheme - Theme for Internet Explorer 10+ on Windows 8/8.1 in "Metro" Mode.
addonsList - this is an array of the available add-ons, which is only used if "xfileman" is set to 0 and Writer cannot scan the actual directory contents.
deviceList - an array containing the default Device List for the Simulator. Each entry is in the format of: [ "Device Name" , "phone|tablet" , "OS" , "skin_folder" ]
AddOns - an array of which add-ons to load in the order they should be loaded.
_editor_url - do not change this, it tells Ryuzine Writer where the Xinha4Ryuzine rich text editor is located.
_editor_lang - synchronizes the language localization of the Xinha4Ryuzine rich text editor with the Writer User Interface. You should not change this, change the setting under "language" above.
_editor_icons - sets which icons will be used by the Xinha4Ryuzine rich text editor. Valid options are "Classic," "Crystal," and "Tango."
There is a separate configuration file, editor.config.js, which is exclusively for the Xinha4Ryuzine rich text editor which, ideally, you should not edit unless you are familiar with the stand-alone Xinha editor.
11.8 Compatability
The Ryuzine web apps are designed to work in modern web browsers on current platforms. They are typically backwards compatible a browser version or two but generally will not work in legacy browsers or on obsolete platforms.
11.7.1 Ryuzine Writer
It is intended for use in browsers running on desktop operating systems.
- Apple Safari 6+ (Mac OS X)
- Google Chrome 40+ (Windows, Mac OS X, & Linux)
- Firefox 30+ (Windows, Mac OS X, & Linux)
- Internet Explorer 10+ (Windows)
- Opera 20+ (Windows, Mac OS X, & Linux)
- Microsoft Edge (Windows)
There is an experimental user interface for mobile device browsers, but it is incomplete and has usability issues. Running Ryuzine Writer on a mobile device is therefore not recommended, and you should definitely not use it in production.
11.7.2 Ryuzine Reader & Ryuzine Rack
- Apple Safari 5 (Mac OS X 10.6.8 or later)
- Google Chrome 30+ (Windows XP or later, Mac OS X 10.6.8 or later, Linux 3.0+)
- Firefox 20+ (Windows XP or later, Mac OS X 10.6.8 or later, Linux 3.0+)
- Opera 20+ (Windows XP or later, Mac OS X 10.7 or later , Linux 3.0+)
- Internet Explorer 9* or later (Windows XP or later, Internet Explorer 10+ recommended)
- Microsoft Edge (Windows 10)
- Mobile Safari (iOS 7.1 or later)
- Android Browser (Android 2.3 or later, Android 4.0+ recommended)*
- Chrome Mobile (Android 4.0 or later)*
- Internet Explorer Mobile (Windows Phone 7.5+)*
- Silk Browser (FireOS 4.1+)
* Browser does not support some of the features or functionality but web app is usable.
11.7.3 Legacy Browsers
The Ryuzine web apps no longer support use in legacy browsers (i.e., versions earlier than those listed above). That doesn't mean the web apps won't necessarily work in some of them, just that they are no longer targets for the Ryuzine project so no further testing will be done in them or fixes applied to make the web apps function in them.
There is a "polyfills.js" script which can be loaded before all other scripts and that attempts to fix some of the compatibility issues. This appears to work in older versions of Safari and Mobile Safari on iOS, but it doesn't work so well with older versions of Internet Explorer. Even if the web app loads without errors, however, it will be limited to the features supported by the legacy browser and you may not be able to use some add-ons or themes.
If you absolutely need to target legacy browser (like seriously old versions of Internet Explorer) you should consider using beta version Ryuzine 0.9.5 which still natively supported many legacy browsers, including Internet Explorer 7 and 8, Firefox 3.6, Safari 4.05, and "pre-Blink" Opera. The beta versions are not open source, however Ryu Maru is no longer enforcing the terms of the proprietary commercial-use license, but keep in mind no further development or fixes will be offered for these beta versions.
12. Development
12.1 License
"Ryuzine" and "Ryuzine Writer" are released under the Mozilla Public License (MPL) 2.0, the full text of which is bundled with the web apps and available online.
"Ryuzine Press" is released under the GNU General Public License version 3 (GPLv3).
Add-ons, Themes, Skins or other components may be under other licenses. All of the add-ons available at the release of version 1.0 were available under an MIT license.
Distribution of publications in Ryuzine format does not require you to also provide source code if the webapp or plugin code has not been modified.
12.2 Contributing
The Ryuzine web apps are now open source projects which means anyone can help improve them. This section offers a quick overview of how you can help.
Getting Started
- Make sure you have a GitHub account
- Read the Open Source Code of Conduct
- Search Issues to see if your issue has already been addressed and
- Report your issue (assuming it did not already exist)
- Clearly describe the issue including steps to reproduce it.
- Make sure you fill in the earliest version that you know has the issue.
- Fork the repository on GitHub
Making Changes
- Create a topic branch from where you want to base your work
- This will usually be the Master Branch.
- Only target other branches if you are certain your fix must be on that branch.
- Please avoid working directly on the Master Branch!
- Make commits of logical units
- Make sure your commit messages are in the proper format and include a Developer Certificate of Origin sign-off (see below).
Documentation
For changes to comments and documentation, it is not always necessary to create a new issue. In this case it is appropriate to start the first line of a commit with 'DOCS'. Documentation contributions also require a proper sign-off in your commit message.
Pull requests:
Changes to this project should be proposed as pull requests on Github.
Proposed changes will then go through code review there and once approved, be merged in the main branch. There is no timeline for merges or releases.
Intellectual Property License:
By default, any contribution to a Ryu Maru project is made under the same license included in the project's respective repository.
The author of a change remains the copyright holder of their code. The copyright holder grants license for contributions to be used in the project, this is not an assignment of rights to the project.
Rebadged and Derivative Versions
Before you create a derivative or custom version ask yourself if you really need to do so. Changing the branding to your own logos and icons is a built-in feature. Themes allow you to conform the look and feel to your other publications. Add-Ons allow you to expand the webapps with new functionality. You are not required to publicly release any custom themes or add-ons you create.
To change branding add an "#applogo" element with an image and swap out app icons with your own (Ryuzine Press allows you to simply select images from your WordPress media library, Ryuzine Rack also allows individual data catalogs to have a "Masthead" branding image). Other elements can be altered using a custom theme. However, the webapps are still identified as "Ryuzine" in the "About" dialog, copyright notices, and code.
If you fork the project(s) into a new project you MUST de-brand/re-brand all user-facing elements. The "Ryuzine" name, logo, and the Ryu Maru logos are trademarked properties. The Ryuzine app icons are copyrighted designs licensed only for use in conjunction with the original webapps. If you have maintained compatibility with Ryuzine Add-Ons and Themes you may include wording to that effect in the webapp(s) and/or other materials.
Publications in Ryuzine format are not considered derivative works of the Ryuzine webapp itself.
Developer Certificate of Origin:
To improve tracking of contributions to this project we use the DCO 1.1 and use a "sign-off" procedure for all changes going into the branch.
The sign-off is a simple line at the end of the explanation for the commit which certifies that you wrote it or otherwise have the right to pass it on as an open-source contribution. For full details on how to sign-off on your own commits, or commits on behalf of your employer, please refer to the "contributing.md" file in the project repositories or read them on our website.
Additional Resources
These additional Ryuzine resources are also available:
Official Stable Releases
The official stable releases of the Ryuzine web apps are available for download from the Ryu Maru website. These are pre-configured, bundled versions suitable for general users.
Ryuzine Publisher Distribution Kit
Ryuzine Press Plugin for WordPress
Source Code
The source code may have fixes and features not found in the stable releases, but are neither preconfigured nor bundled. You can't just download the repositories and have a functioning version of the Ryuzine web apps, as some assembly and configuration is required first to make them work. These downloads are suitable for developers, not general users.
Manuals
Ryuzine Document Specification (Reader Wiki)
Ryuzine Press 1.0 Publisher's Manual
Feedback/Bug Reports
If you discover an issue with any of the Ryuzine web apps you should report it in the appropriate Ryu Maru GitHub repository for that web app.
Social Media
Connect to and follow Ryu Maru on Facebook, Google+, and Twitter.
Back Cover
Table of Contents
Copyright 2015 K.M. Hansen & Ryu Maru